Why This Cheesecake Works So Well
This Decadent No-Bake Biscoff Cheesecake You’ll Love to Make gives you bakery style results with very little effort and no oven heat. You get a thick, creamy slice with clean edges, a crisp cookie base, and that unmistakable caramel spice flavor in every bite.
The Biscoff biscuit crust uses plenty of melted butter, so it firms up nicely in the fridge and lifts out of the pan without crumbling. When you slice it, the crust stays put instead of scattering across the plate. Using room temperature cream cheese (like the one I use in my orange velvet cake with orange cream cheese frosting) lets the filling beat up silky smooth, so you do not fight stubborn lumps later when you fold in the whipped cream. The Biscoff spread goes right into the filling instead of just sitting on top, which means the cookie butter flavor runs all the way through the cheesecake, not just in the garnish.
A long chill time, at least 6 hours but ideally overnight, gives the filling time to set to a plush, sliceable texture that still feels light on the tongue. Whipped heavy cream takes the place of eggs and baking, adding air and structure so the filling sets without the oven and stays creamy instead of dense. There is no water bath, no worrying about cracks, and no guessing if the center is done.
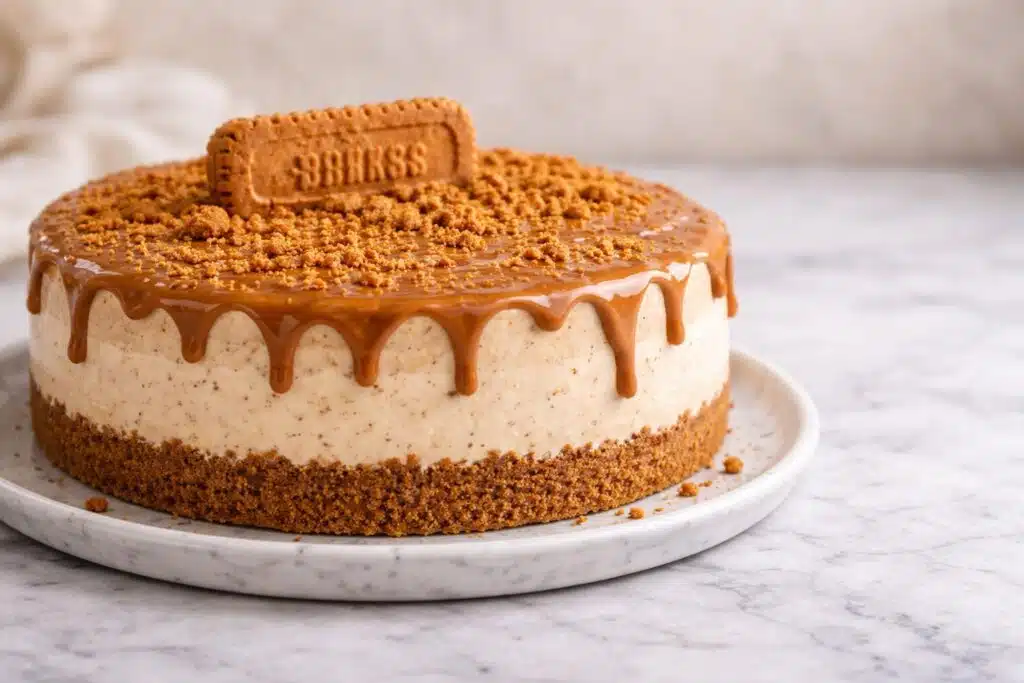
A simple drizzle of melted Biscoff spread and a few extra biscuits on top turn a very straightforward make ahead dessert into something that looks like it came from a bakery window. If you already love easy treats like my no bake strawberry cheesecake or other cookie butter icebox desserts, this Decadent No-Bake Biscoff Cheesecake You’ll Love to Make will slide right into your regular dessert rotation.
How to Make It
You will start your Decadent No-Bake Biscoff Cheesecake You’ll Love to Make by building that buttery, gently spiced crust. Stir the crushed Biscoff biscuits with the melted butter until every crumb looks glossy and evenly damp. When you press the mixture into your springform pan, use the bottom of a measuring cup to pack it down firmly, and nudge some crumbs slightly up the sides for a neat edge. If the crumbs still look dry or sandy, add another teaspoon or two of melted butter and mix again until it looks like wet sand that holds when you press it. Slide the pan into the fridge while you move on, and give the crust at least 15 minutes to firm up so it can support the filling.
For the filling, beat the cream cheese, powdered sugar, Biscoff spread, and vanilla bean paste together until the mixture looks glossy and completely smooth. Scrape the bowl a couple of times, since cream cheese loves to hide along the sides and at the bottom. Gently fold in the already whipped heavy cream using a spatula, turning the bowl as you go so you keep the mixture airy. The filling should look billowy and hold soft peaks, not run across the bowl or look grainy.
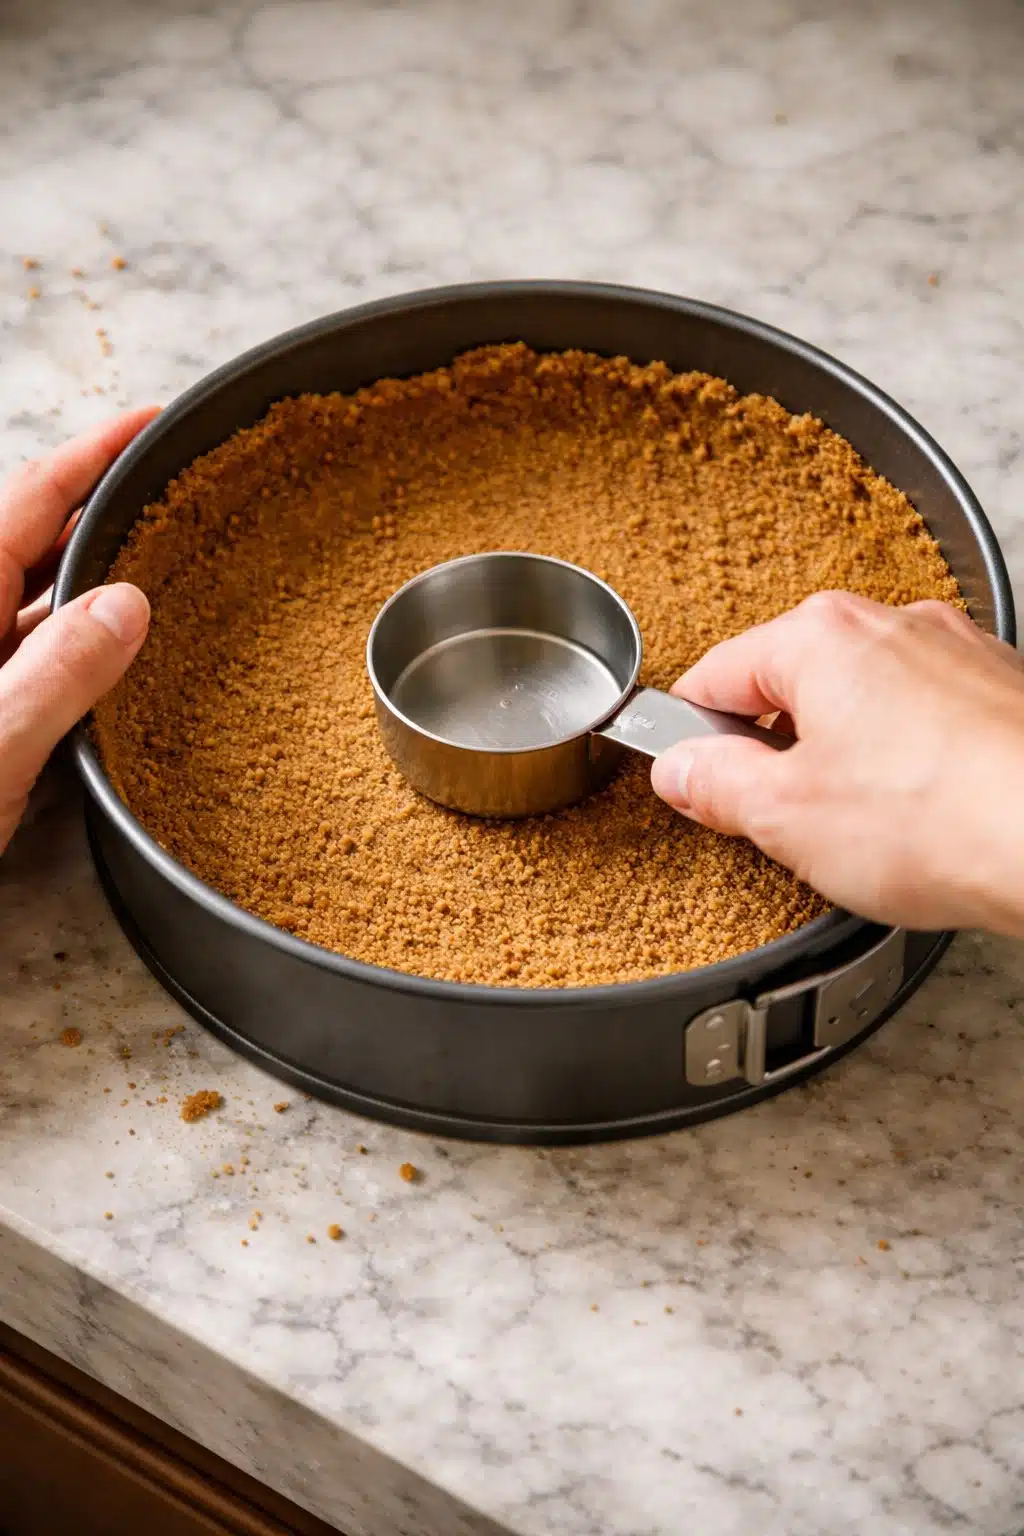
Process Image of Decadent No-Bake Biscoff Cheesecake You’ll Love to Make
Spoon the filling over the chilled crust and spread it evenly. Use an offset spatula or the back of a spoon to smooth the top. Tap the pan lightly on the counter to release any big air pockets, then cover the pan and chill the cheesecake for at least 6 hours, or overnight if you can wait. When you are ready to serve, warm the Biscoff spread until it is pourable and drizzle it in a thin stream over the top. Finish with crumbled or whole biscuits for crunch. Use a sharp knife dipped in warm water and wiped dry between cuts for the cleanest slices.
Time, Prep, and Storage Plan
This Decadent No-Bake Biscoff Cheesecake You’ll Love to Make is as kind to your schedule as it is indulgent on your spoon. You only need about 30 minutes of hands on prep, plus at least 6 hours of chill time, so it fits easily into a busy day. I like to make the crust and filling right after breakfast, then let it chill all day so it is ready after dinner. For an extra firm texture and picture perfect slices, leave it overnight in the fridge. Use a 9 inch springform pan and clear a flat space in your refrigerator before you start so you are not juggling containers with a pan full of silky cheesecake in your hands.
Once the cheesecake is fully chilled and garnished, store it covered in the refrigerator for up to 4 days. I recommend keeping it in the springform pan with the ring still on for the first 12 hours, then you can transfer slices to an airtight container if that is easier. The crust stays pleasantly crisp for the first 2 days, then softens slightly but still tastes rich and buttery. If you want to work even further ahead, you can assemble the crust and filling, wrap the pan well, and freeze for up to 1 month. Thaw it in the fridge overnight, then drizzle the melted Biscoff spread and add the biscuit garnishes just before serving for the freshest taste and prettiest finish.
Flexible Options and Serving Notes
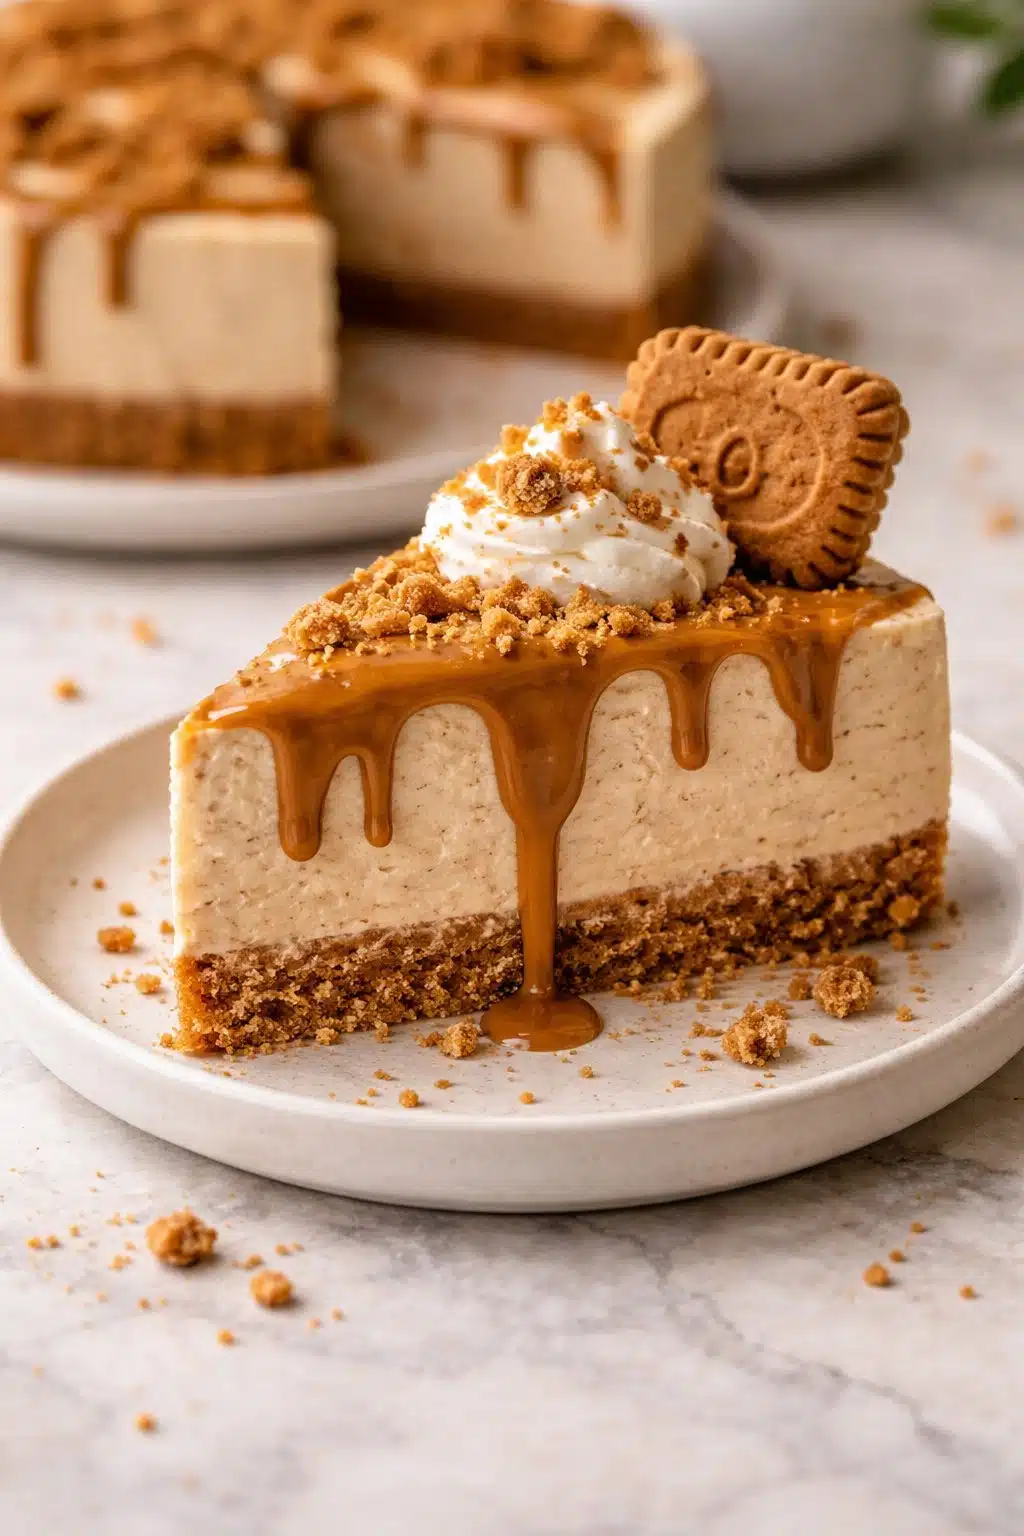
Serving Image of Decadent No-Bake Biscoff Cheesecake You’ll Love to Make
This Decadent No-Bake Biscoff Cheesecake You’ll Love to Make is surprisingly adaptable, so you can cozy it up for weeknights or dress it like a showpiece for special dinners. For a more casual feel, make it in an 8 by 8 inch pan and slice it into squares, almost like cheesecake bars, similar to the feel of my Snickers cheesecake bars. If you prefer individual servings, divide the crust and filling between 8 small jars or glasses, then drizzle the melted Biscoff on top just before serving.
You can also lighten the flavor by swapping half of the Biscoff spread in the filling with plain cream cheese, which gives you a slightly tangier cheesecake that pairs beautifully with fresh berries. I also love to tuck in a very thin layer of sliced strawberries or bananas between the crust and filling when I want something that feels a bit like a creamy cookie crust trifle.
You can serve this cheesecake simply, with just the Biscoff drizzle and biscuit crumbs, or you can build a whole dessert moment around it. A small dollop of softly whipped cream and a sprinkle of flaky sea salt on each slice really brighten the caramelized cookie flavor and keep the sweetness in check. If your crowd loves variety, serve narrow slices alongside a scoop of vanilla or cinnamon ice cream, or a little cup of strong espresso. The texture holds nicely at room temperature for about 30 minutes, so you can slice it just before guests sit down, then let it soften slightly for that dreamy, melt on the tongue feel. Any leftovers keep well in the refrigerator for up to 3 days, or freeze individual slices on a tray, then wrap them, so you can tuck away a midnight piece of this Decadent No-Bake Biscoff Cheesecake You’ll Love to Make whenever the craving hits.
Conclusion
I love how a simple cheesecake can turn an ordinary day into a small celebration, and this Decadent No-Bake Biscoff Cheesecake You’ll Love to Make does exactly that. There is just something about that silky filling and caramel spiced cookie crust that makes people lean in a little closer around the table. It is the kind of dessert that has everyone asking for “just one more tiny slice” while they linger and chat.
I hope you feel ready to grab your mixing bowl, crush those cookies, and create your own special moment with this cheesecake. Make it for a birthday, a cozy Sunday dinner, or just because the week was long and you deserve something a bit indulgent. Every swirl of topping and every crumb of crust is a chance to slow down and enjoy the process, not just the final plate.
When you try this recipe, I would love to hear how you served it and who you shared it with.
Recipe

Decadent No-Bake Biscoff Cheesecake You'll Love to Make
Ingredients
Ingredients
- 9 ounces Biscoff biscuits crushed
- 7 tablespoons unsalted butter melted
- 14 ounces cream cheese room temperature
- 3/4 cup powdered sugar
- 3/4 cup Biscoff spread
- 1 teaspoon vanilla bean paste
- 1 1/4 cups heavy cream whipped to soft peaks
- 3 tablespoons Biscoff spread melted
- 4 Biscoff biscuits crumbled or whole, for garnish
Instructions
- Lightly grease a 9 inch springform pan and line the base with parchment paper.
- In a medium bowl, combine the crushed Biscoff biscuits and melted butter and mix until all crumbs are evenly moistened.
- Transfer the crumb mixture to the prepared pan and press firmly into an even layer over the base, pushing slightly up the sides; refrigerate while you make the filling.
- In a large mixing bowl, beat the cream cheese, powdered sugar, Biscoff spread, and vanilla bean paste until smooth and creamy, scraping down the sides of the bowl as needed.
- Gently fold the whipped heavy cream into the cream cheese mixture with a spatula until fully combined and airy.
- Pour the filling over the chilled crust and spread the top into an even layer, smoothing the surface.
- Tap the pan gently on the counter to release any large air bubbles, then cover the pan and refrigerate for at least 6 hours or overnight until set.
- When ready to serve, warm the Biscoff spread until pourable, then drizzle over the top of the chilled cheesecake.
- Garnish with crumbled or whole Biscoff biscuits, release the cheesecake from the springform pan, slice with a warm sharp knife, and serve chilled.
Notes
- For clean slices, wipe the knife with a warm damp cloth between each cut and dry it before slicing again.