Why This Recipe Works
This Biscoff Cake layers flavor from three directions, so every bite tastes like those caramelized Lotus cookies, not just plain vanilla with frosting on top. The batter uses both Biscoff spread and buttermilk, which keeps the crumb moist and tender instead of heavy. A mix of butter and oil gives you the best of both worlds: rich flavor from butter, plus the soft, velvety texture you usually find in bakery style cakes. Vanilla bean paste supports the warm spice in the Biscoff instead of competing with it, so the flavor stays clear and balanced.
The frosting strategy keeps this Biscoff Cake from becoming cloyingly sweet. Cream cheese and butter form a creamy base that tones down the sugar and lets the Biscoff spread shine. A small amount of powdered sugar is all you need, since cookie butter already brings sweetness and body. A touch of cinnamon and salt sharpen the flavor, so it tastes complex rather than one note. This means you can enjoy a generous slice without feeling like you are chewing a sugar brick.
You also get true bakery style structure, which matters if you plan to stack or decorate the cake. The flour to fat ratio gives sturdy but soft layers that level easily and hold their shape under frosting. Crushed Lotus cookies and an extra hit of melted Biscoff in the center add texture and visual contrast, which makes each cut slice look impressive with very little effort. The bake time and visual cues, like edges pulling from the pan and a clean toothpick, help you avoid dry cake, so you end up with consistent, repeatable results every time you make it.
How to Make It
To make this Biscoff Cake, start by preparing your pans so the layers release cleanly. Line two 20 cm round cake pans with parchment and lightly grease the sides, then preheat your oven to 180 C or 350 F. Whisk the flour, baking powder, baking soda, and salt in a separate bowl so the leavening distributes evenly. In a large mixing bowl, beat the softened butter and sugar until light and slightly fluffy, then blend in the Biscoff spread until the mixture looks smooth and creamy. Add the oil and vanilla bean paste, mix well, then beat in the eggs one at a time, scraping the bowl so no streaks remain. Alternate adding the dry ingredients and buttermilk, starting and ending with the dry mix, and stop mixing as soon as the batter looks combined and smooth.

Process Image of Biscoff Cake
Divide the batter evenly between the pans, level the tops with a spatula, and bake on the middle rack for about 35 to 40 minutes, until the edges pull away slightly and a toothpick comes out clean or with a few moist crumbs. Let the cakes cool in the pans for at least 15 minutes, then run a thin knife around the edges and transfer them to a wire rack to cool completely. While they cool, make the frosting by beating the softened butter and cream cheese until smooth, then mix in the Biscoff spread, cinnamon, salt, and vanilla. Gradually sift in the powdered sugar, adding the whipping cream as needed until the frosting is creamy, spreadable, and not overly stiff. To assemble, place one cooled cake layer on your stand, spread a generous layer of Biscoff frosting, drizzle about 1 third cup warmed Biscoff, and sprinkle with the crushed Lotus cookies for crunch. Top with the second cake layer, cover the whole Biscoff Cake with the remaining frosting, then finish with more cookie crumbs or a gentle Biscoff drizzle for that bakery style finish.
Time, Prep, and Storage Plan
From start to finish, this Biscoff Cake takes about 2 hours and 30 minutes, including cooling and frosting. Plan for about 45 minutes of active prep to make the batter, bake the layers, and whip the frosting, plus 35 to 40 minutes of baking and at least 30 to 40 minutes of cooling before you level and fill the cake. If you are entertaining, you can bake the cake layers a day ahead, wrap each cooled layer tightly in plastic, and keep them at room temperature. You can also make the Biscoff frosting a day in advance, refrigerate it in an airtight container, then bring it back to room temperature and beat it briefly to restore that creamy texture.
For storage, keep a fully frosted Biscoff Cake covered in the refrigerator for up to 4 days. The cookie butter and cream cheese in the frosting hold best when chilled, but the cake still stays moist. Slice and let pieces sit at room temperature for 20 to 30 minutes before serving so the crumb softens and the Biscoff flavor comes through. For longer storage, slice the cake, wrap each piece well, and freeze for up to 2 months. Thaw slices overnight in the refrigerator, then let them sit on the counter until just cool to the touch. If you want extra Lotus cookie crunch on top, add crushed cookies right before serving so they stay crisp instead of turning soft in the fridge.
Flexible Options and Serving Notes
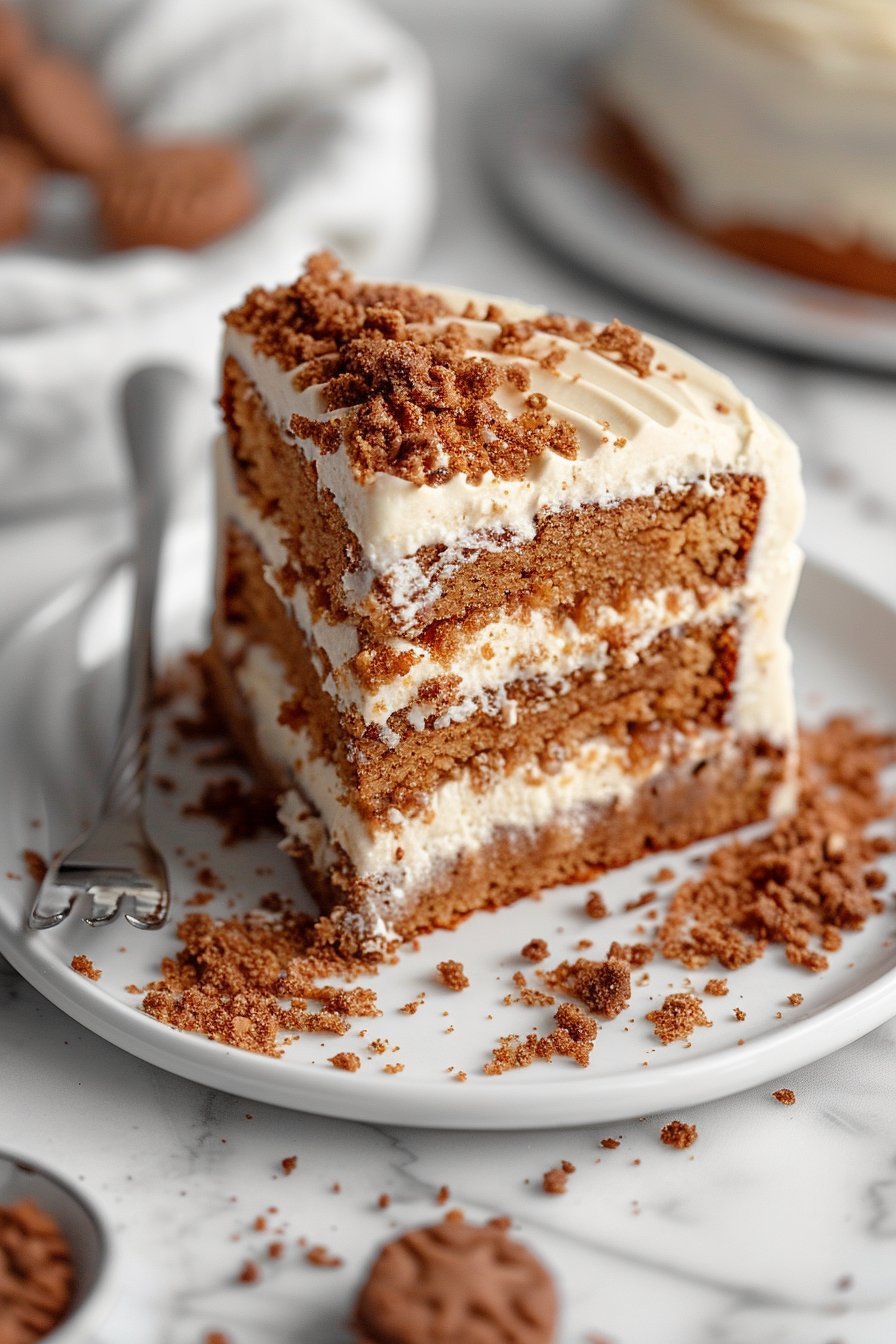
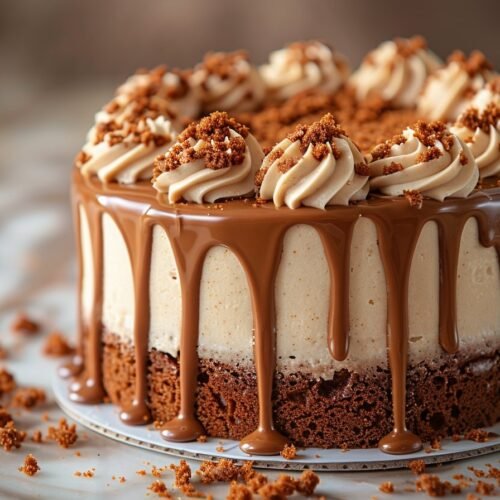
You can take this Biscoff Cake in a few different directions without losing that deep cookie butter flavor. For a lighter texture and look, fill the layers with the creamy Biscoff frosting, but leave the top semi naked and finish with just a thin swipe of frosting and a handful of crushed Lotus cookies. If you prefer a richer finish, warm the extra Biscoff spread until pourable, then use it as a drip over fully frosted sides and let it set for 10 to 15 minutes before slicing. The recipe works well as a 9 by 13 inch sheet cake too, which is a smart choice for parties or office treats, since you can keep the decoration simple with swoops of frosting and cookie crumbs. For smaller groups, halve the recipe and bake it as a single 8 inch round, then serve it as a tall single layer with a generous blanket of frosting on top.
This Biscoff Cake tastes best at cool room temperature, when the buttercream is slightly soft and the crumb turns very moist and tender. If you make it ahead, chill the fully assembled cake, then bring it out 30 to 45 minutes before serving so the frosting relaxes. For a clean flavor contrast, pair each slice with unsweetened whipped cream, Greek yogurt with a little vanilla, or a scoop of lightly salted caramel or vanilla bean ice cream. Coffee, black tea, or a simple cold brew cut through the sweetness and make this an easy dessert to serve after something rich like a creamy pasta bake or a cheesy chicken casserole from your regular rotation. However you slice it, use a long, sharp knife, wipe it between cuts, and follow the scored lines from your first slice so every piece looks bakery neat.
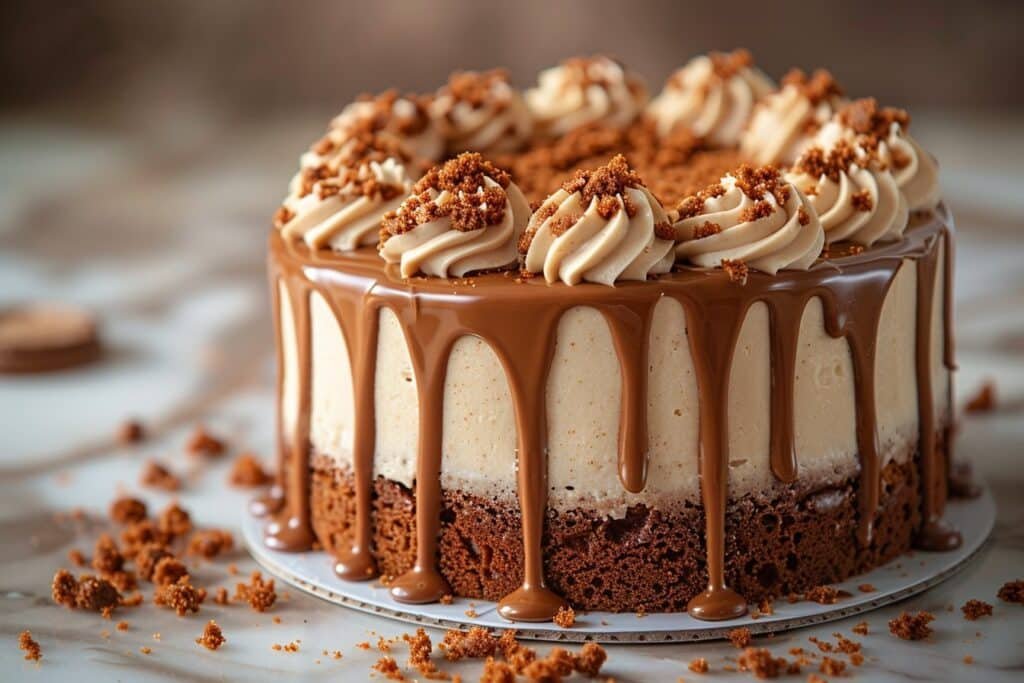
Serving Image of Biscoff Cake
Conclusion
When you pull this cake from the oven and slice into that soft, caramel scented crumb, you feel it right away: this is the kind of dessert that invites people to pause, sit down, and share a moment together. A simple afternoon coffee becomes a little celebration, and a regular weeknight suddenly feels just a bit more special. That is the quiet magic of a homemade Biscoff Cake.
I love how recipes like this turn small gatherings into memories. You can bake it for coworkers, family, or neighbors, and watch the plate empty faster than you expected. You do not need fancy skills or equipment here, just a bit of time and curiosity in the kitchen. If you have been waiting for a sign to try it, consider this your gentle nudge to preheat the oven and start whisking.
I would truly love for you to make this cake, share it with someone you care about, and make it your own.
For more delicious recipes like this, follow us on Facebook and Pinterest!
Recipe
Biscoff Cake
Ingredients
Ingredients
- 2 1/2 cups all-purpose flour
- 1 1/2 teaspoons baking powder
- 1/2 teaspoon baking soda
- 1/2 teaspoon salt
- 1/2 cup unsalted butter softened
- 3/4 cup granulated sugar
- 2/3 cup Biscoff spread
- 1/2 cup vegetable oil
- 2 teaspoons vanilla bean paste
- 3 large eggs at room temperature
- 1 1/4 cups buttermilk at room temperature
- 1 cup unsalted butter softened (for frosting)
- 2 ounces cream cheese softened (for frosting)
- 3/4 cup Biscoff spread for frosting
- 1/2 teaspoon ground cinnamon for frosting
- 1/4 teaspoon salt for frosting, omit if using salted butter
- 1 teaspoon vanilla bean paste for frosting
- 2 1/2 to 3 cups powdered sugar for frosting
- 2 tablespoons whipping cream or milk for frosting
- 1/3 cup Biscoff spread warmed (for filling)
- 6 Lotus Biscoff cookies crushed (for filling)
Instructions
- Preheat the oven to 350 F. Line the bottoms of two 8-inch round cake pans with parchment paper and lightly grease the sides.
- In a medium bowl whisk together the flour, baking powder, baking soda, and salt, then set aside.
- In a large mixing bowl beat 1/2 cup softened butter and the granulated sugar on medium speed until light and slightly fluffy.
- Add 2/3 cup Biscoff spread to the butter mixture and beat until smooth and creamy.
- Add the vegetable oil and 2 teaspoons vanilla bean paste to the bowl and mix until fully combined.
- Add the eggs one at a time, beating well and scraping down the bowl after each addition.
- Add one third of the dry ingredients to the bowl and mix on low just until blended, then add half of the buttermilk and mix again. Repeat with another third of the dry ingredients, the remaining buttermilk, and finish with the remaining dry ingredients, mixing only until the batter is smooth.
- Divide the batter evenly between the prepared pans and smooth the tops with a spatula.
- Bake on the middle rack for 35 minutes, or until the edges start to pull away from the sides and a toothpick inserted into the center comes out clean or with a few moist crumbs.
- Let the cakes cool in the pans for 15 minutes, then run a thin knife around the edges and carefully turn onto a wire rack. Remove the parchment and cool completely.
- While the cakes cool, make the frosting. In a large bowl beat 1 cup softened butter until smooth and creamy.
- Add the cream cheese and 3/4 cup Biscoff spread to the bowl and beat until smooth and fully combined.
- Add 2 cups powdered sugar, the cinnamon, 1/4 teaspoon salt, and 1 teaspoon vanilla bean paste. Start mixing on low speed, then increase to medium until smooth.
- Add the remaining powdered sugar a little at a time, alternating with splashes of whipping cream, until the frosting is thick, creamy, and spreadable.
- Place the 1/3 cup Biscoff spread in a small microwave safe bowl and microwave on medium power for 30 to 45 seconds, then stir until smooth and let cool slightly.
- If the cake layers are domed, use a serrated knife to gently level the tops once they are completely cool.
- Place one cake layer on a serving plate or cake stand and spread a thin layer of frosting over the top.
- Drizzle the warmed Biscoff over the frosted layer and spread into an even layer, then sprinkle with the crushed Lotus cookies.
- Place the second cake layer on top, pressing gently to set.
- Apply a thin crumb coat of frosting over the top and sides of the cake and chill for 20 minutes until set.
- Once set, frost the top and sides of the cake with the remaining frosting, smoothing or swirling as desired. Keep refrigerated until serving.
Notes
- If the frosting feels too soft, chill it for 10 to 15 minutes, then beat briefly before frosting the cake.
- Store the finished cake covered in the refrigerator for up to 4 days, and bring slices to room temperature before serving for the best texture.