

Why These Marbled Red Velvet Cheesecake Bars Turn Out So Good
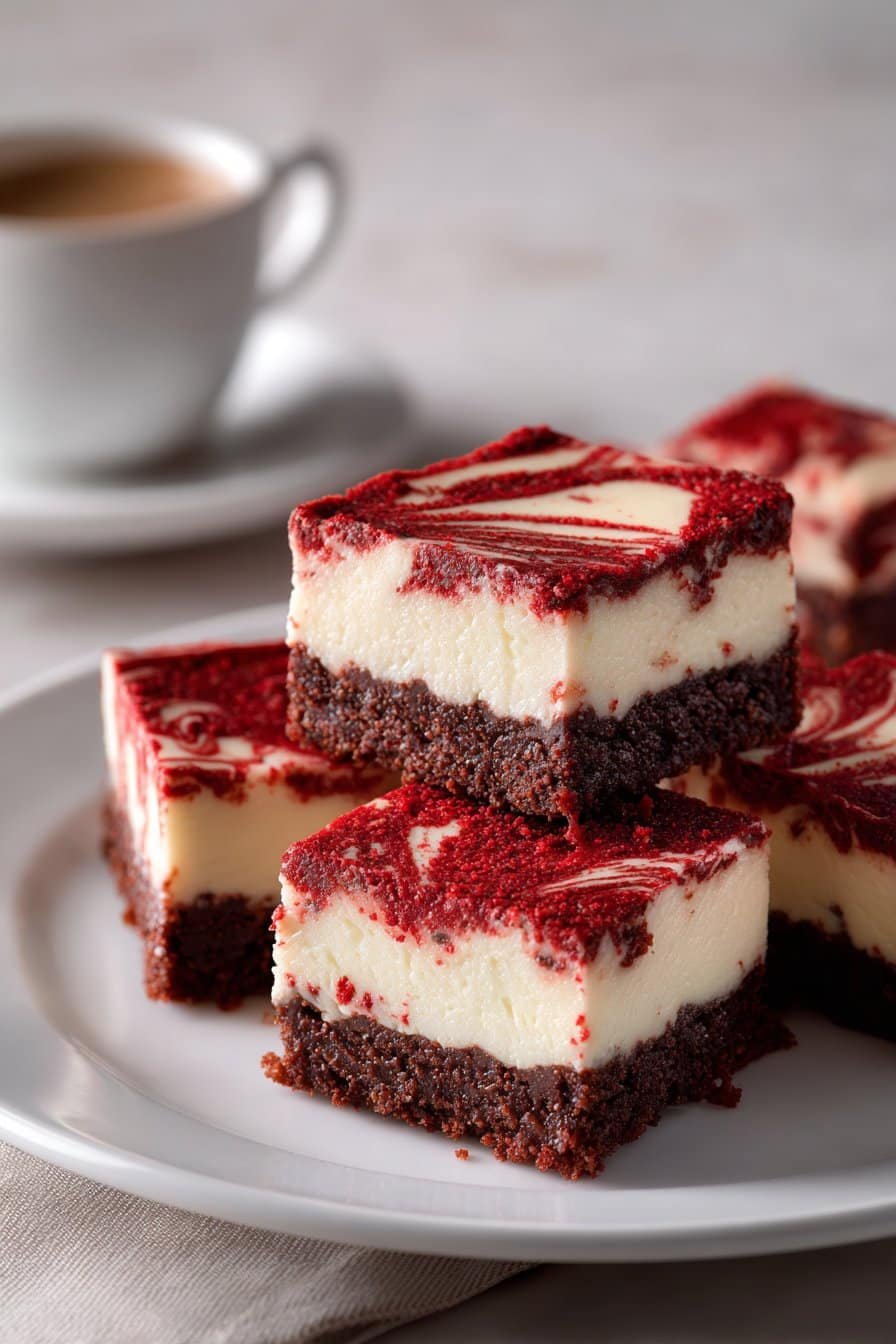
If you love the idea of a dessert that slices cleanly, travels well, and still looks like it came from a bakery case, these Marbled Red Velvet Cheesecake Bars are your new secret weapon. You get the drama of a full cheesecake and the comfort of a brownie in one easy pan, with that pretty red-and-cream swirl doing all the showing off for you.
These Marbled Red Velvet Cheesecake Bars work so well because the base is really a fudgy brownie, not a dry cake layer. Melted butter (instead of creamed butter) gives you that dense, chewy texture that can stand up to a thick layer of cheesecake without going soggy. A mix of granulated and brown sugar adds just enough moisture and a light caramel note, so the chocolate base tastes rich and brownie-like rather than plain cocoa.
Keeping the dry ingredients minimal—only flour, cocoa, and a pinch of salt—means the batter doesn’t get tough, even if you stir a little more than you meant to. And baking it all in an 8×8 pan keeps the bars nice and thick, so every bite has an equal hit of chocolate and cream cheese.
The cheesecake layer stays smooth and lush thanks to softened cream cheese, room temperature eggs, and a touch of sour cream for tang and silkiness. That tablespoon of flour in the cheesecake batter might look insignificant, but it gently stabilizes the filling, helping it set cleanly and slice without cracking or weeping.
Reserving a small portion of the cheesecake batter to color red means you get a true marbled swirl: the white and red ribbons stay distinct instead of bleeding together into pink. You only need a few figure-eight motions with a knife or skewer, so even if you’re not “artsy,” you’ll still pull out a pan that looks bakery-worthy on your first try.
The moderate 350°F bake ensures the cheesecake sets through the center while the brownie base stays moist—no dry edges or jiggly middle—making these bars reliable enough for holidays, potlucks, bake sales, or just a Friday night reward.
How to Make These Swirled Oven-Baked Bars
Start by setting yourself up for success: line your pan with parchment, letting it hang over the edges like little handles so you can lift the bars out cleanly later. Lightly grease the parchment so nothing sticks and your marbled top stays intact.
The base comes together like a simple, cocoa-rich brownie. Whisk the melted butter with both sugars until the mixture looks glossy and thick. Add the egg and vanilla bean paste and whisk again until it turns smooth and satiny.
Gently stir in the cocoa, flour, and salt just until no dry streaks remain. The batter should look dense and shiny. Stop as soon as everything is combined; overmixing here makes the crust tough instead of fudgy.
Spread this batter into your prepared pan, smoothing it right into the corners so your Marbled Red Velvet Cheesecake Bars bake evenly and don’t form thin, overbaked edges. A small offset spatula works beautifully for this, but the back of a spoon will do in a pinch.
For the cheesecake layer, make sure your cream cheese is truly softened; it should give easily when pressed with a fingertip and not feel cool and firm in the center. Beat it until perfectly smooth (scrape the bowl a few times so no tiny lumps hide along the bottom or sides), then add the sugar and mix until it looks creamy and slightly fluffy.
Add the eggs one at a time, mixing on low just until each one disappears. Follow with the vanilla bean paste and sour cream, still on low, until the batter looks silky and uniform. Too much air at this stage can cause cracks later, so keep the mixer gentle.
Fold in the tablespoon of flour by hand for a sturdier, sliceable texture. The batter should feel pourable but not runny. Now reserve 1/3 cup of this velvety cheesecake batter in a small bowl for the red swirl.
To create that signature marbled red velvet look, stir the extra tablespoon of sugar and red food coloring into the reserved cheesecake batter until the color is completely even and vivid. Aim for a deep, confident red; it will soften slightly as it bakes.
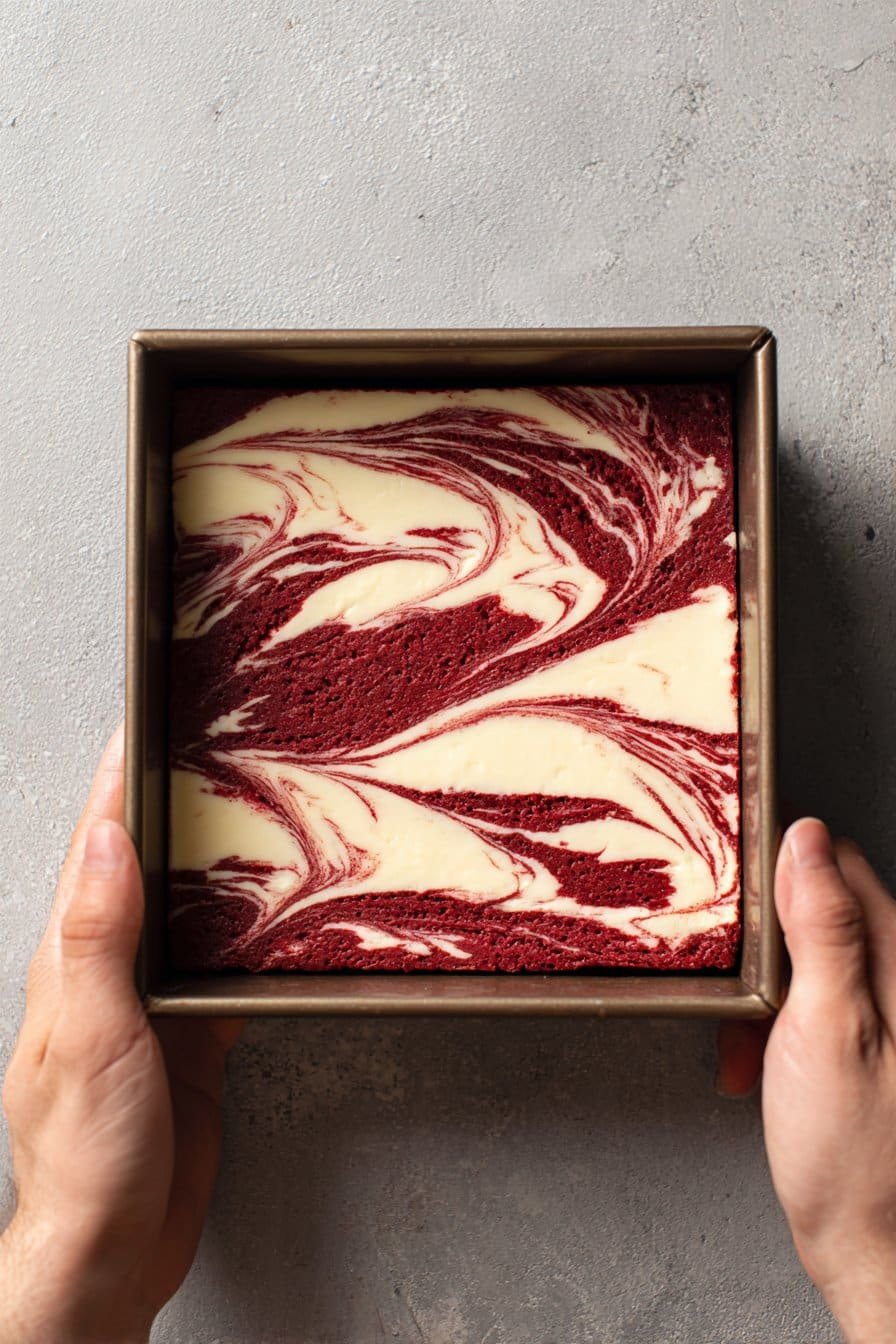
Pour the plain cheesecake mixture over your brownie base, using an offset spatula to smooth it into one level layer without digging into the chocolate. Dollop the red batter over the top in about 8 to 10 spoonfuls, spacing them out so every slice catches some color.
Drag a skewer or thin knife through the dollops in gentle “S” motions, being careful not to dig into the brownie layer, until you see pretty ribbons instead of harsh streaks. Work slowly and stop sooner than you think—two or three passes are usually enough.
Bake until the edges are set and the center has a slight jiggle when you nudge the pan. The top should look matte, not wet. Cool the pan completely on a wire rack, then chill before slicing; like good cheesecake brownies or even a classic red velvet dessert, the flavor and texture improve once the bars have had time to rest.
Time, Prep, and Storage Plan for Easy Cheesecake Bar Days
From start to finish, these Marbled Red Velvet Cheesecake Bars take about 1 hour total: roughly 25 minutes of hands-on prep and 40 minutes in the oven. You can easily fit the mixing and baking in between prepping dinner or cleaning up the kitchen.
What the recipe card doesn’t always show is the hidden hero of cheesecake: cooling time. You will want at least 1½–2 hours for the bars to cool at room temperature, plus another 2 hours in the fridge to fully set for neat, clean slices. They should feel chilled and firm all the way through before you cut them.
If you plan to serve them for a party or holiday dessert tray (they look beautiful next to classic brownies or lemon bars), make them earlier in the day or the night before. Bake the pan in the afternoon, let it cool on the counter while you go about your evening, then slide it into the fridge before bed so it’s ready to slice the next day.
For storage, keep your Marbled Red Velvet Cheesecake Bars covered and chilled at all times. In the refrigerator, they stay fresh for up to 5 days. I like to store them in a single layer in an airtight container so the marbled top stays pretty and doesn’t stick to a lid or plastic wrap.
If you want to bake ahead, these bars freeze surprisingly well. Chill them first, then wrap the whole slab (or individual squares) tightly in plastic, followed by a layer of foil. Label and freeze for up to 2 months, and thaw overnight in the fridge before serving.
If you love doing dessert prep days, you can even bake a pan of these alongside a batch of blondies or cookie bars so your freezer is always stocked with “emergency” treats. Future you will be very thankful when a last-minute guest appears or a late-night craving hits.
Flexible Options and Serving Notes for Marbled Red Velvet Cheesecake Bars
These Marbled Red Velvet Cheesecake Bars are surprisingly flexible, so you can nudge them toward whatever your day (or dessert craving) calls for.
If you want a slightly thicker bar with more height and drama, bake the recipe in a 9×5-inch loaf pan and extend the bake time by 5–10 minutes, keeping a close eye on the center. Check for that gentle jiggle and set edges.
For a crowd, you can double the recipe and bake it in a 9×13-inch pan. The bars will be a bit thinner, but the swirl still looks beautiful, and you’ll get more than 12 servings—perfect for potlucks, office trays, or school events.
You can also dial the richness up or down. Use full-fat cream cheese and sour cream for the creamiest, most indulgent version. Or swap the sour cream for plain Greek yogurt for a slightly lighter—but still velvety—bite. Just keep the same quantities so the texture stays stable.
When it comes to color and flavor tweaks, you have options. If you prefer a more subtle hue, reduce the red food coloring by half; the bars will take on a deeper cocoa-red tone instead of that bold bakery-style red.
You can also play with flavor add-ins. Stir a handful of mini chocolate chips into the brownie base for extra fudginess, or swirl a tablespoon of raspberry jam into the cheesecake layer for a tart contrast (similar to how you’d treat the fruit in lemon blueberry crumble bars or raspberry swirl cheesecake). Add just a little at a time so your marbling stays defined and not muddy.
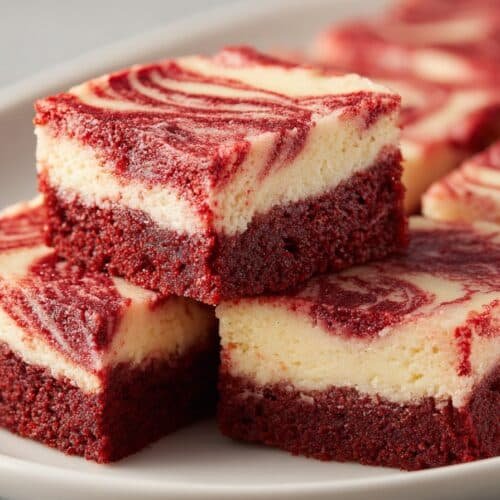
For serving, chill the baked Marbled Red Velvet Cheesecake Bars for at least 3–4 hours, then cut them with a hot, clean knife for neat edges and visible swirls. Wipe the blade between cuts for the sharpest lines.
I like to serve them straight from the fridge for a firm, dense texture, but if you enjoy a softer, mousse-like cheesecake, let the bars sit at room temperature for about 15 minutes before slicing. You can dress them up with a light dusting of cocoa powder, a dollop of whipped cream, or a few fresh berries on each square for a dessert-plate moment.
Leftovers keep well in an airtight container in the refrigerator for up to 4 days, or you can freeze individual bars (well wrapped) for up to 2 months—perfect for those nights when you “just want a bite” and end up very glad Past You baked a whole pan.
Serving of Marbled Red Velvet Cheesecake Bars
Conclusion
If you’re anything like me, dessert is never just about something sweet on a plate—it’s about the memory that comes with it. These Marbled Red Velvet Cheesecake Bars have a way of turning ordinary moments into little celebrations: a quiet coffee with a friend, a weeknight “we made it” treat, or a surprise pan on the table after Sunday dinner that gets everyone leaning in for just one more square.
There’s something magical about that marbled swirl that feels both playful and special, no piping bags or fancy skills required. You mix, you swirl, the oven does the rest, and suddenly you have a pan that looks like it took all afternoon.
I hope you feel excited to tie on your apron, preheat your oven, and give this recipe a try. Trust yourself, have fun with the swirls, and remember that slightly imperfect marbling still tastes absolutely heavenly. Share them with the people you love, wrap up a few for a neighbor, or sneak one as a late-night kitchen snack—no judgment from me.
Instructions Process of Marbled Red Velvet Cheesecake Bars
How do I get a clear marbled pattern in Marbled Red Velvet Cheesecake Bars?
Start by spreading the red velvet base into an even layer so your swirls have a smooth canvas. Pour most of the plain cheesecake batter on top, then gently spread it without digging into the red layer. Dollop spoonfuls of the red-tinted cheesecake batter over the top, spacing them out. Use a thin knife or skewer and drag it through the batter in loose “S” shapes or figure eights, without overworking it. Stop as soon as you see distinct streaks; too much swirling turns everything pink instead of marbled.
Why are room temperature ingredients important for these bars?
Softened cream cheese and room temperature eggs blend together smoothly, which gives your Marbled Red Velvet Cheesecake Bars that ultra-creamy texture. Cold ingredients can seize, creating little lumps that never quite disappear, no matter how long you mix. Room temperature eggs and sour cream also help everything bake more evenly. If you forget to take your eggs out, set them in a bowl of warm (not hot) water for about 10 minutes. For cream cheese, unwrap it and let it sit on the counter for 30 to 45 minutes before baking.
How should I store and serve Marbled Red Velvet Cheesecake Bars?
Once the bars cool completely, cover the pan tightly or transfer slices to an airtight container and refrigerate. They keep well for up to 5 days and actually taste even better after chilling overnight. For the best flavor and texture, let them sit at room temperature for about 15 to 20 minutes before serving so the cheesecake layer softens slightly. If stacking, place a piece of parchment between layers to prevent sticking and protect that pretty marbling.
Recipe
Marbled Red Velvet Cheesecake Bars
Ingredients
Ingredients
- 1/2 cup unsalted butter melted
- 3/4 cup granulated sugar
- 1/4 cup light brown sugar packed
- 1 large egg at room temperature
- 1 teaspoon vanilla bean paste
- 1/3 cup unsweetened cocoa powder
- 1/2 cup all-purpose flour
- 1/4 teaspoon salt
- 16 ounces cream cheese softened
- 1/2 cup granulated sugar
- 2 large eggs at room temperature
- 1/2 teaspoon vanilla bean paste
- 1/4 cup sour cream
- 1 tablespoon all-purpose flour
- 1 tablespoon granulated sugar
- 1 teaspoon liquid red food coloring
- Nonstick spray or extra butter for the pan
Instructions
- Preheat the oven to 350°F. Lightly grease an 8x8-inch baking pan and line it with parchment paper, leaving an overhang on two sides for easy lifting. Lightly grease the parchment.
- In a large bowl, whisk together the melted butter, 3/4 cup granulated sugar, and brown sugar until smooth and glossy.
- Add 1 egg and 1 teaspoon vanilla bean paste to the sugar mixture and whisk until smooth and well combined.
- Sift in the cocoa powder, 1/2 cup flour, and salt. Stir gently with a spatula just until no dry streaks remain and the batter is thick and shiny.
- Spread the brownie batter evenly into the prepared pan, smoothing it into the corners. Set the pan aside.
- In a medium bowl, beat the softened cream cheese with a hand mixer on medium speed until completely smooth, scraping the bowl as needed.
- Add 1/2 cup granulated sugar to the cream cheese and beat until creamy and slightly fluffy.
- Add the 2 eggs to the cream cheese mixture one at a time, beating on low speed just until each egg is incorporated.
- Add 1/2 teaspoon vanilla bean paste and sour cream and mix on low speed until the cheesecake batter is smooth and silky.
- Sift in 1 tablespoon flour and gently fold it in with a spatula until just combined.
- Measure out 1/3 cup of the cheesecake batter into a small bowl and set aside for the red swirl.
- To the reserved 1/3 cup cheesecake batter, add 1 tablespoon granulated sugar and red food coloring and stir until the color is evenly bright red.
- Pour the remaining plain cheesecake batter over the brownie base in the pan and spread it into an even layer without disturbing the brownie layer.
- Drop spoonfuls of the red cheesecake batter over the white cheesecake layer, spacing the dollops evenly across the surface.
- Use a thin knife or skewer to gently swirl the red batter into the white in an “S” or figure-eight motion, creating a marbled pattern without cutting into the brownie layer.
- Bake for 35 to 40 minutes, until the edges are set and the center is mostly set with a slight jiggle when the pan is gently shaken.
- Remove the pan from the oven and let the bars cool completely at room temperature on a wire rack.
- Once cooled, refrigerate the pan for at least 4 hours, or until thoroughly chilled, before lifting the bars out by the parchment and slicing into 12 squares.
Notes
- Do not overmix the brownie batter after adding the dry ingredients; stopping as soon as it comes together keeps the base fudgy.
- Chill the bars fully before cutting for the cleanest slices and neat marbling.
- Use gel food coloring instead of liquid for a deeper red color if desired, using the same measured amount.


