
The Practical Why Behind It
These Valentine’s Day Cheesecake Brownies look romantic, but underneath the swirls there’s a very practical logic. Using melted butter instead of creamed butter keeps the brownies dense and fudgy, and it helps you get that shiny, crackly top you see in bakery cases—with no mixer and no fuss. I also love using vanilla bean paste in both the brownie and cheesecake layers. It adds depth and a warm, fragrant sweetness so the two components taste like one thoughtful dessert, not like random layers stacked together.
That simple 9×9 pan does a lot of work here. It gives you a batter depth that’s thick enough for bold, dramatic swirls, but still bakes through in about 35 minutes. You get clean edges, a slightly gooey center, and distinct ribbons of cheesecake running through each piece.
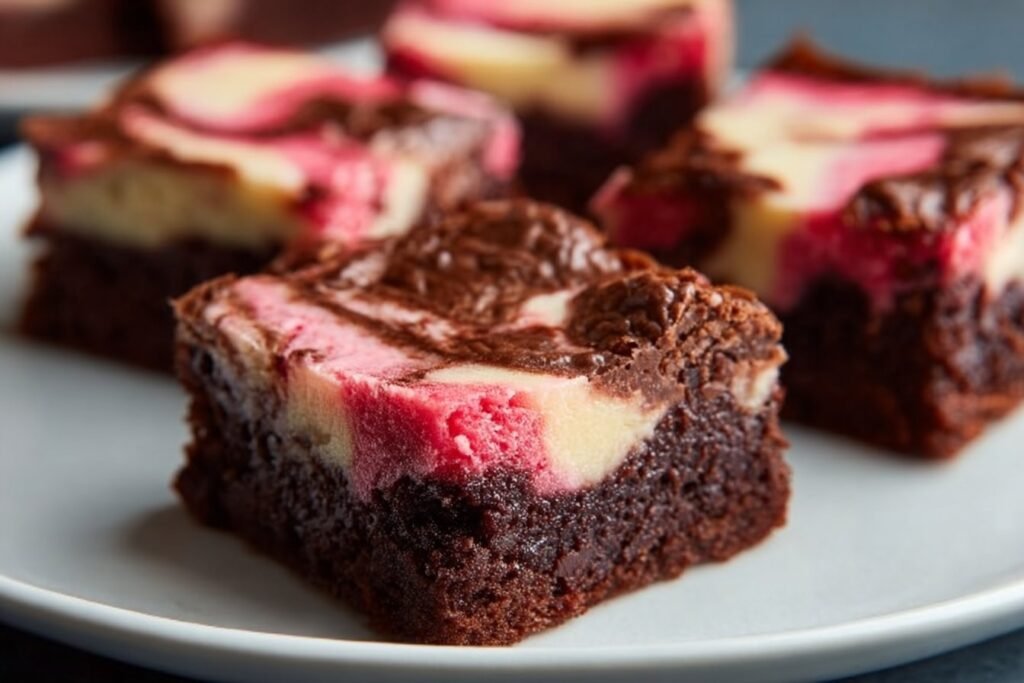
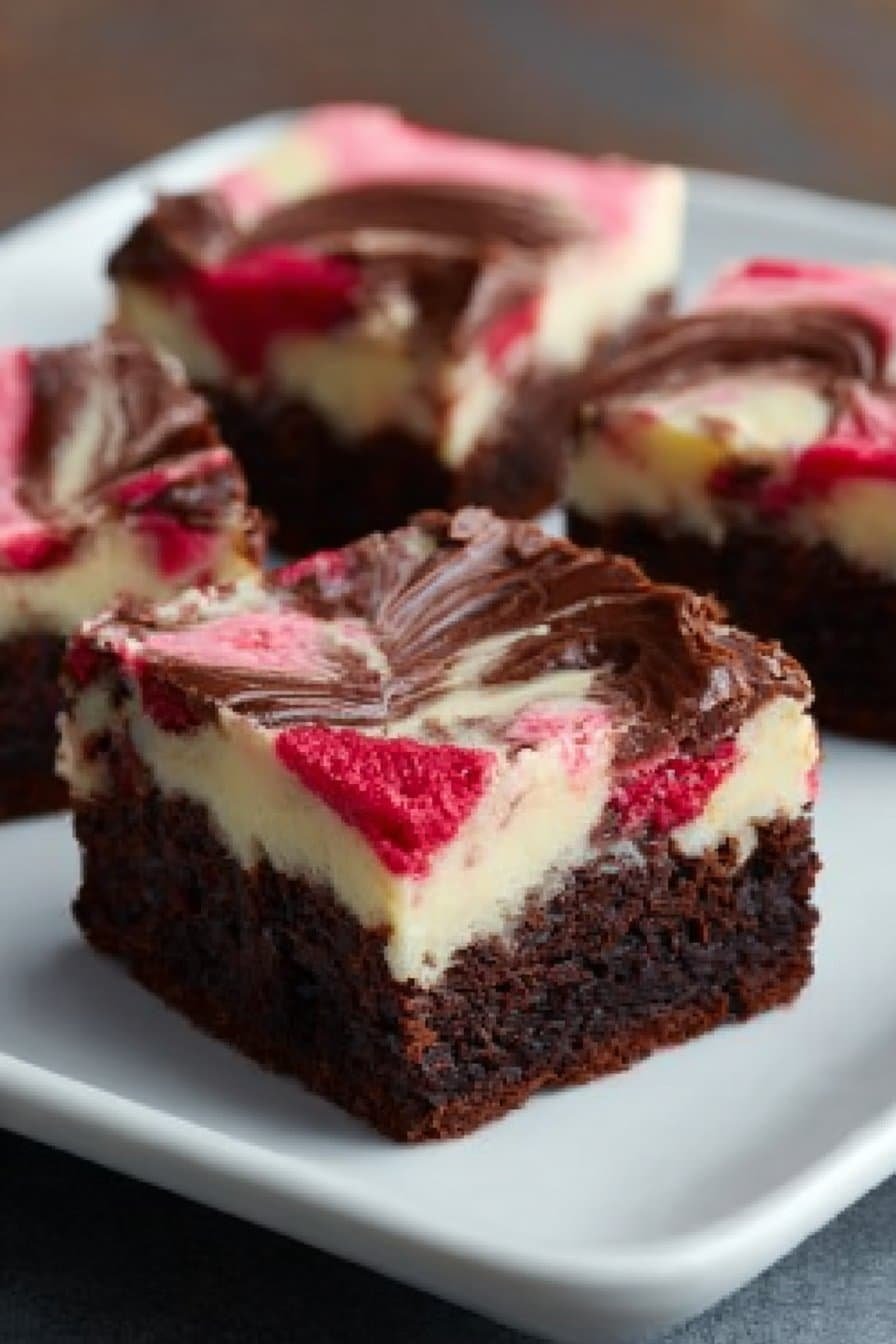
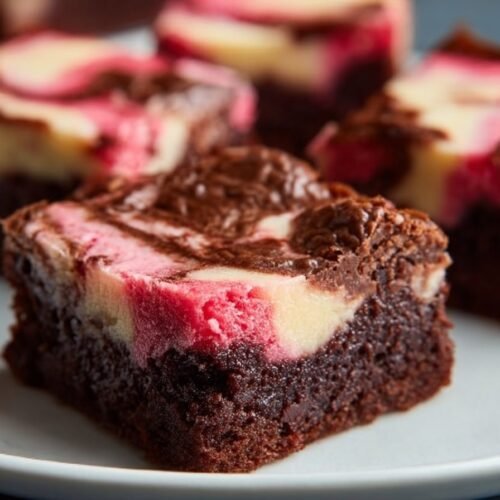
The cheesecake swirl isn’t just for looks, either. That soft, tangy cream cheese layer balances the rich cocoa base, so each square tastes indulgent but not heavy or overly sweet. When you spoon the cheesecake mixture over the brownie batter and swirl, you control the cheesecake-to-brownie ratio in every bite—wide pools for a richer cheesecake feel, or thinner streaks for more chocolate-forward brownies. And because you’re working with one brownie batter and one cheesecake mixture, clean-up stays manageable, even if you’re also dipping strawberries or assembling another simple dessert on the side.
Timing-wise, these brownies fit nicely into a Valentine’s Day schedule. With about 15 minutes of hands-on prep, you can have the pan in the oven while you finish dinner. They cool and set as you eat, and by the time you’re ready for dessert, they slice into neat, bakery-style squares. The flavor actually improves after a short chill, so you can bake them the day before and check dessert off your list early. Add the optional red food coloring and you get an instant Valentine’s Day Cheesecake Brownies moment: a pan of glossy chocolate and pink swirls that looks like you spent all afternoon on it.
Step-by-Step Method for Perfect Swirled Cheesecake Brownies
Start by preheating your oven to 350°F so it’s fully hot by the time your batter is ready. Lightly grease a 9×9 inch baking pan. If you like sharp, tidy edges, line the pan with parchment paper, leaving an overhang on two sides so you can lift the cooled brownies out in one piece. This makes slicing your Valentine’s Day Cheesecake Brownies much easier.
In a large bowl, whisk together the melted butter and sugar until the mixture looks thick, glossy, and slightly lightened in color. This helps dissolve some of the sugar and sets you up for that classic crackly brownie top. Add the eggs and vanilla bean paste and whisk just until the mixture is smooth and cohesive. Stop as soon as it looks uniform—overmixing at this stage can add too much air and push the brownies toward a cakier texture.
In a separate bowl, whisk together the flour, cocoa powder, and salt until no cocoa streaks remain. This keeps the cocoa from clumping. Gently fold the dry mixture into the wet using a spatula. Sweep the spatula down the center of the bowl and around the sides, turning the bowl as you go. Stop as soon as you no longer see dry pockets of flour. A few tiny lumps are fine; you want a thick, shiny batter that slowly ribbons off the spatula. Pour the brownie batter into your prepared pan and smooth the top with an offset spatula or the back of a spoon, pushing it into the corners so it bakes evenly.
For the cheesecake layer, place the softened cream cheese and sugar in a medium bowl. Beat with a hand mixer or a sturdy whisk until the mixture looks creamy and completely smooth, with no visible lumps. If your cream cheese is still a bit cool, give it an extra minute of mixing rather than cranking up the speed—you want it silky, not airy. Add the egg and vanilla bean paste and mix on low just until everything comes together. The mixture should look thick, glossy, and pourable but not runny.
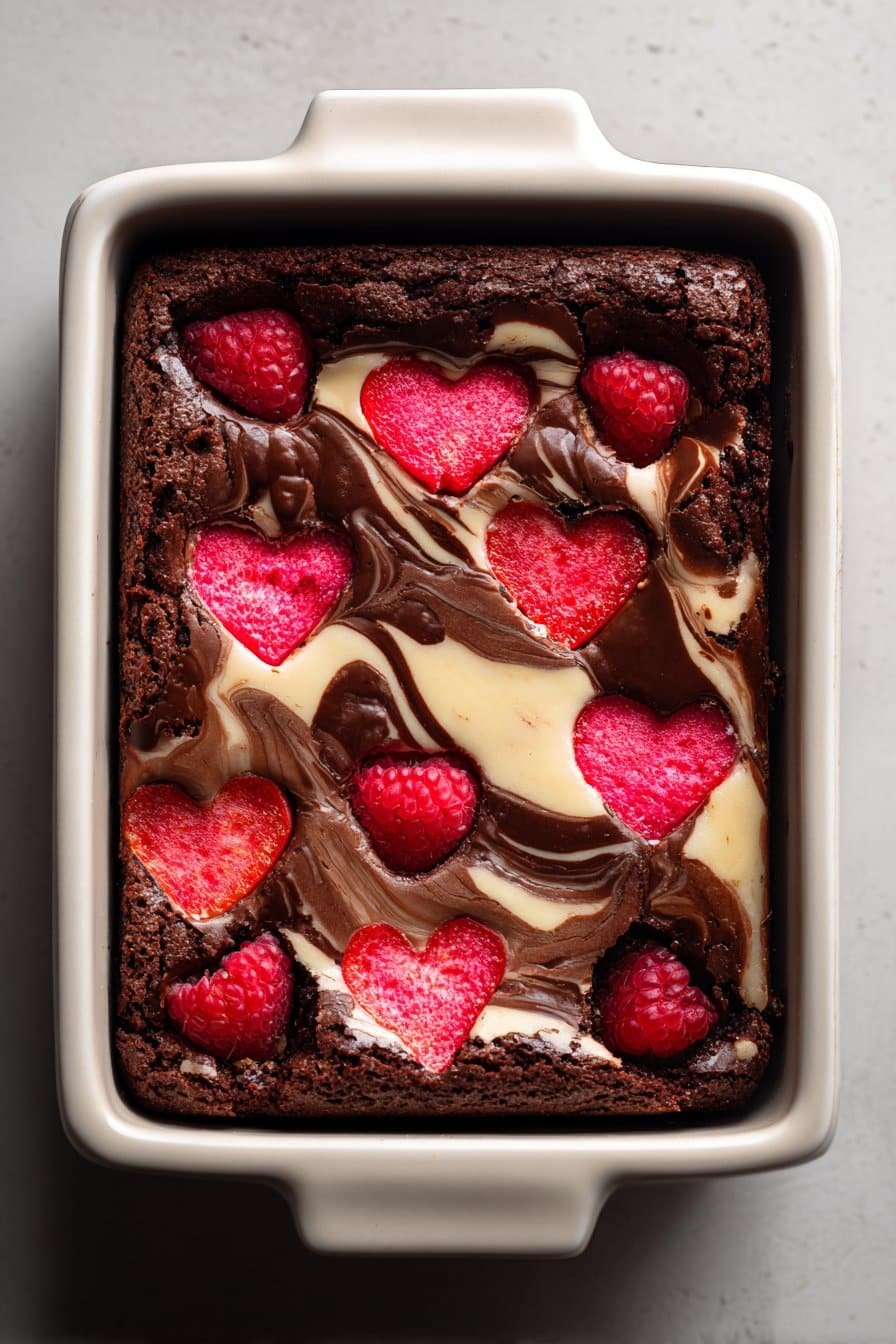
For the Valentine’s theme, add red food coloring a drop or two at a time, mixing gently between additions. Aim for a shade slightly deeper than you think you want; the color will soften a bit as it bakes. You can go for a pale blush pink or a bold red—both look beautiful against the dark brownie base.
Drop spoonfuls of the cheesecake mixture evenly over the brownie batter, leaving some brownie showing between dollops. Take a butter knife or skewer and swirl the two layers together by dragging the knife through the dollops in loose “S” curves. Move horizontally across the pan, then vertically, to create those bakery-style ribbons. Try not to dig the knife too deep or overwork the batter—you want defined swirls, not a fully blended pink batter.
Bake for 30 to 35 minutes, rotating the pan halfway through if your oven has hot spots. The edges should look set and slightly pulled away from the sides of the pan, and the center should no longer jiggle when you gently shake the pan. A toothpick inserted into a brownie-only area (avoid a big cheesecake pocket) should come out with a few moist, fudgy crumbs but no wet batter.
Set the pan on a wire rack and let the brownies cool completely in the pan. The cheesecake layer will continue to firm up as it cools. For ultra-clean squares, chill the pan in the refrigerator for at least 1 hour before slicing. Lift the whole slab out using the parchment, then cut into 16 pieces, wiping your knife with a warm, damp cloth between cuts for those picture-perfect Valentine’s Day Cheesecake Brownies.
Make-Ahead and Storage Notes for Cheesecake Brownies
One of my favorite things about these Valentine’s Day Cheesecake Brownies is how well they behave ahead of time—very on brand for a romantic dessert. You can bake them up to 2 days in advance, then cool them completely in the pan. Once cool, cover the pan tightly with foil or plastic wrap so no fridge odors sneak in.
For the cleanest, most bakery-like slices, refrigerate the baked slab for at least 2 hours before cutting. The chilled cheesecake swirl sets up nicely, so your knife glides through without dragging color across the top. Store sliced brownies in an airtight container, layering them with pieces of parchment or wax paper so the swirls stay intact and the tops don’t smudge. Keep them in the refrigerator for up to 4 days.
When you’re ready to serve, let the brownies sit at room temperature for about 20 to 30 minutes. The brownie layer will soften, the chocolate flavor will bloom, and the cheesecake will taste extra creamy and velvety.
If you want to work even farther ahead, these Valentine’s Day Cheesecake Brownies freeze beautifully. Once they’re completely cool, cut into squares. Wrap each piece tightly in plastic wrap, then place the wrapped brownies in a freezer bag or sealed container. They’ll keep well for up to 2 months without picking up freezer flavors.
To serve from frozen, thaw the brownies in the refrigerator overnight, or let them rest on the counter for about an hour until the centers no longer feel icy. Try to avoid the microwave if you can—quick bursts of heat can make the cheesecake layer rubbery around the edges. For gifting (say, tucked next to a slice of chocolate loaf cake or paired with a small jar of brownie sundae sauce), chill the brownies first, then wrap. The firm cheesecake swirl stays neat and photogenic that way. And remember: condensation is the enemy of a glossy top, so let brownies come back to room temperature while still wrapped, then unwrap once they’ve warmed slightly.
Variations and How to Serve It Beautifully
You can dress these Valentine’s Day Cheesecake Brownies up or keep them cozy and simple. For a classic, almost retro look, skip the food coloring and go for a black-and-white marble effect. Or add just 1–2 drops of red for a soft blush swirl instead of a bold red top.
If you want bigger chocolate drama, fold ½ cup of chocolate chips into the brownie batter before spreading it in the pan. You’ll get little pockets of melted chocolate in the fudgy base. For a fruity twist, sprinkle a thin layer of crushed freeze-dried raspberries over the cheesecake layer before baking. They add a tangy pop and a pretty speckled look.
You can also bake the batter in a parchment-lined 8×8 pan for slightly thicker, bakery-style squares. Just add about 3–5 minutes to the bake time and keep an eye on the edges. The center should still have a bit of give when you tap the pan. If you need a gluten-free option, use a cup-for-cup gluten-free flour blend in place of the all-purpose flour and mix gently once you add the dry ingredients to avoid a tough texture.
When it comes to serving, let your Valentine’s Day Cheesecake Brownies chill in the fridge for at least 1–2 hours for the cleanest cuts and a creamy, set cheesecake layer. For a romantic plate, cut the brownies into squares or rectangles, then use a heart-shaped cutter on a few pieces. Dust those heart cutouts with powdered sugar for a soft, snowy finish.
I love plating them with a small scoop of vanilla ice cream, a drizzle of warm chocolate or raspberry sauce, and a few fresh berries on the side. For a party platter, slice them into bite-size bars, fan them out on a large tray, and add bowls of whipped cream and chopped strawberries so everyone can top their own. If you’re building a dessert board—maybe alongside chocolate-covered strawberries, sugar cookies, or little truffles—these brownies add a rich, swirled centerpiece that feels bakery-worthy without adding much extra work.
Serving of Valentine’s Day Cheesecake Brownies
Conclusion
Every pan that comes out of the oven feels a little like a love letter, and these Valentine’s Day Cheesecake Brownies are no exception. You’re swirling together chocolate, cream cheese, and a bit of care into something that brings people to the table and makes them linger just a little longer. Whether you’re baking for a partner, your kids, your friends, or treating yourself (which absolutely counts), this dessert has that bakery-style look with a very homey heart.
Once you’ve mixed the batter and cheesecake layer, the rest feels surprisingly simple—just swirl, bake, and let the oven do the work. Don’t worry about achieving perfect marbling or identical slices. Focus on the rich smell filling your kitchen, the soft crack when you cut into the glossy top, and the quiet pause when everyone takes that first bite.
When you’re ready, tie on your apron, preheat the oven, and give these brownies a spot in your Valentine’s Day tradition. And if they happen to show up again on random Tuesdays and cozy weekends, well, that’s just love doing its thing in your kitchen.
Instructions Process of Valentine’s Day Cheesecake Brownies
Can I make Valentine’s Day Cheesecake Brownies ahead of time?
Yes, you can comfortably make Valentine’s Day Cheesecake Brownies a day or two before you plan to serve them. Let them cool completely, then cover the pan tightly or transfer sliced brownies to an airtight container. Because of the cheesecake layer, store them in the refrigerator for up to 3 days. For the best texture, let the brownies sit at room temperature for 20–30 minutes before serving so the brownie turns soft and fudgy again and the cheesecake loses its chill.
How do I get a vibrant red cheesecake swirl?
For a bold Valentine’s Day Cheesecake Brownies swirl, use red gel or liquid food coloring in the cheesecake mixture after it’s completely smooth. Start with 3–4 drops, mix well, then add more one drop at a time until you reach a rich pink or red. Keep in mind that the color will soften slightly as it bakes. Drop spoonfuls of the tinted cheesecake over the brownie batter, then gently drag a butter knife or skewer through in S-shaped motions or figure eights. Stop swirling as soon as you see distinct ribbons—overmixing will muddy the color and blur the design.
How do I know when my Valentine’s Day Cheesecake Brownies are done?
Bake until the edges look set and just begin to pull away from the sides of the pan, and the center no longer wobbles when you gently shake the pan. A toothpick inserted into a brownie-only spot (not a heavy cheesecake pocket) should come out with a few moist crumbs but no wet batter. The cheesecake swirls should look just set and matte on top, not shiny or liquid. If the edges are getting quite firm but the center still seems loose, tent the pan loosely with foil and bake a few minutes longer. Remember, the brownies will continue to firm up as they cool, so pull them out while the center still feels slightly soft for a fudgier texture.
Recipe
Valentine's Day Cheesecake Brownies
Ingredients
Ingredients
- 1 cup unsalted butter melted
- 2 cups granulated sugar
- 3 large eggs
- 1 teaspoon vanilla bean paste
- 1 cup all-purpose flour
- 1/2 cup unsweetened cocoa powder
- 1/4 teaspoon salt
- 8 ounces cream cheese softened
- 1/4 cup granulated sugar
- 1 large egg
- 1/2 teaspoon vanilla bean paste
- 4 –6 drops red food coloring
Instructions
- Preheat the oven to 350°F. Grease a 9×9 inch baking pan and, if desired, line it with parchment paper.
- In a large bowl, whisk together the melted butter and 2 cups granulated sugar until thick and glossy.
- Add 3 eggs and 1 teaspoon vanilla bean paste to the butter mixture and whisk just until smooth.
- In a separate bowl, whisk together the flour, cocoa powder, and salt until well combined.
- Gently fold the dry ingredients into the wet ingredients just until no dry streaks remain, then spread the brownie batter evenly in the prepared pan.
- In a medium bowl, beat the cream cheese and 1/4 cup granulated sugar until very smooth.
- Add 1 egg and 1/2 teaspoon vanilla bean paste to the cream cheese mixture and mix until creamy and glossy.
- Stir in the red food coloring until the color is evenly distributed and reaches your desired shade.
- Drop spoonfuls of the cheesecake mixture evenly over the brownie batter, leaving some brownie batter showing between dollops.
- Use a knife or skewer to gently swirl the cheesecake mixture and brownie batter together to create a marbled pattern.
- Bake for 30 to 35 minutes, or until a toothpick inserted near the center comes out with a few moist crumbs but no wet batter.
- Place the pan on a wire rack and let the brownies cool completely in the pan before cutting into 16 squares.
Notes
- Use room-temperature cream cheese so the cheesecake layer bakes smooth without lumps.


