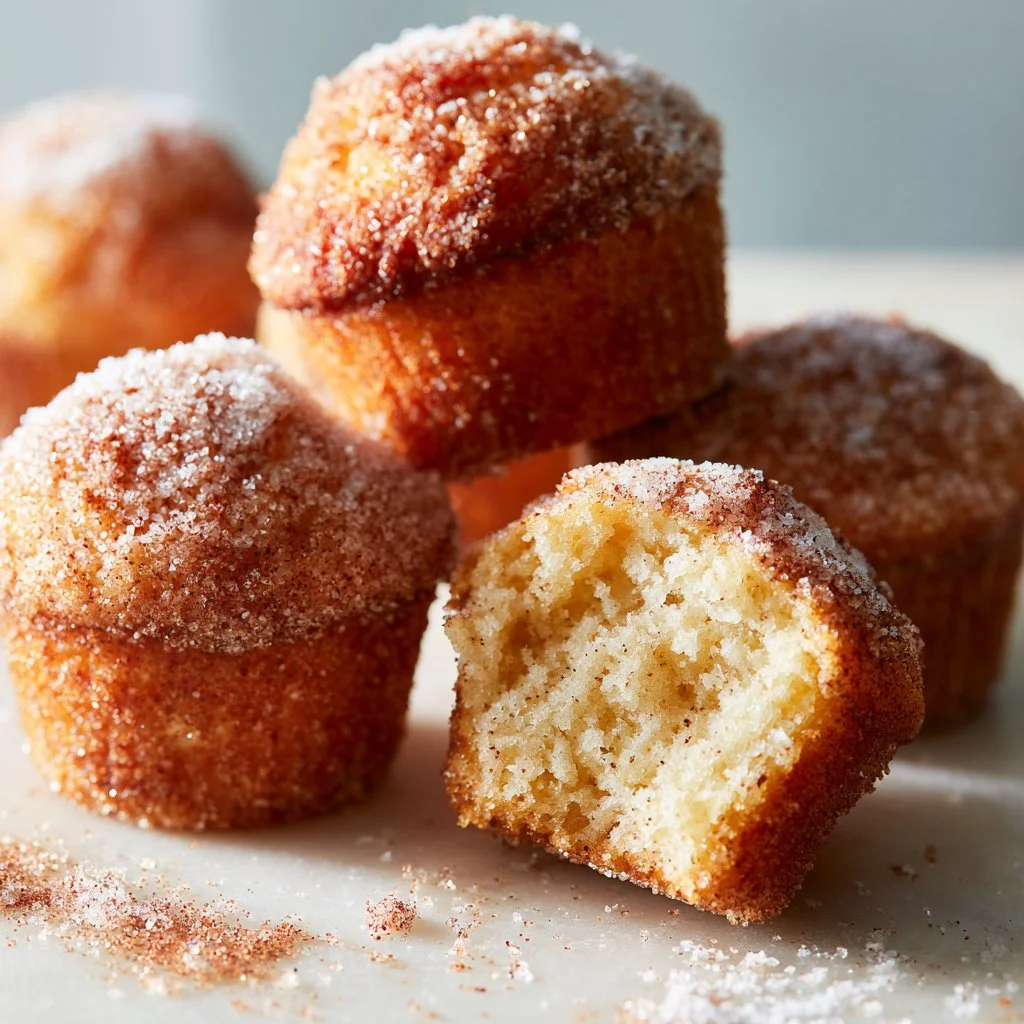
The Memory Behind This Treat
The very first batch of these Strawberry Milkshake Cupcakes started in my mom’s tiny 1970s kitchen, the kind with avocado-green cabinets and a fridge that hummed louder than the TV. Every Friday night in June, she would take my brother and me to the little diner down the road for strawberry milkshakes—tall frosty glasses, extra whipped cream, two straws if we promised not to argue. Years later, I tried to chase that same flavor at home, but the milkshakes kept disappearing too fast and melting too quickly. So one rainy afternoon, I thought, “What if I could bake that feeling instead of sip it?” That’s when I started playing with real strawberry puree, whole milk, and vanilla bean paste to turn that diner memory into something you could hold in one hand without it dripping down your wrist.
Of course, that first version of my Strawberry Milkshake Cupcakes was… not cute. I added way too many strawberries, and the cupcakes came out dense and a little soggy in the middle—more like a pudding than a cupcake. I remember scraping the overbaked edges off the pan and laughing as I ate them anyway because the flavor was so close to that childhood milkshake. Over time, I learned to cook the strawberries down into a gentle puree, let it cool fully before folding it into the batter, and keep the crumb light by not overmixing once the flour goes in. When I finally topped the fluffy cupcakes with pillowy whipped cream frosting instead of buttercream, it all clicked—the look of a soda fountain treat with the cozy soul of a homemade dessert. Now, every time I pipe that little swirl and crown it with a fresh strawberry, it feels like sliding into that cracked vinyl diner booth all over again, except this time, I don’t have to share my dessert with my brother.
How To Make It (Mix & Ingredients)
To get that true Strawberry Milkshake Cupcakes flavor, you’ll start by building a classic, fluffy vanilla base and then loading it up with juicy berries. Let your butter soften until you can press a finger in easily but it doesn’t look greasy—that’s your sweet spot for creaming with sugar. Beat the butter and granulated sugar for a good 3–4 minutes, until it’s very light and almost pale; this step traps air and gives you that milkshake-soft crumb. Add your eggs one at a time so the batter doesn’t curdle, then blend in the vanilla bean paste for those gorgeous little specks and deep vanilla flavor. In a separate bowl, whisk the flour, baking powder, and salt so the leavening is evenly distributed and you don’t end up with lopsided cupcakes.
Instructions Process of Strawberry Milkshake Cupcakes
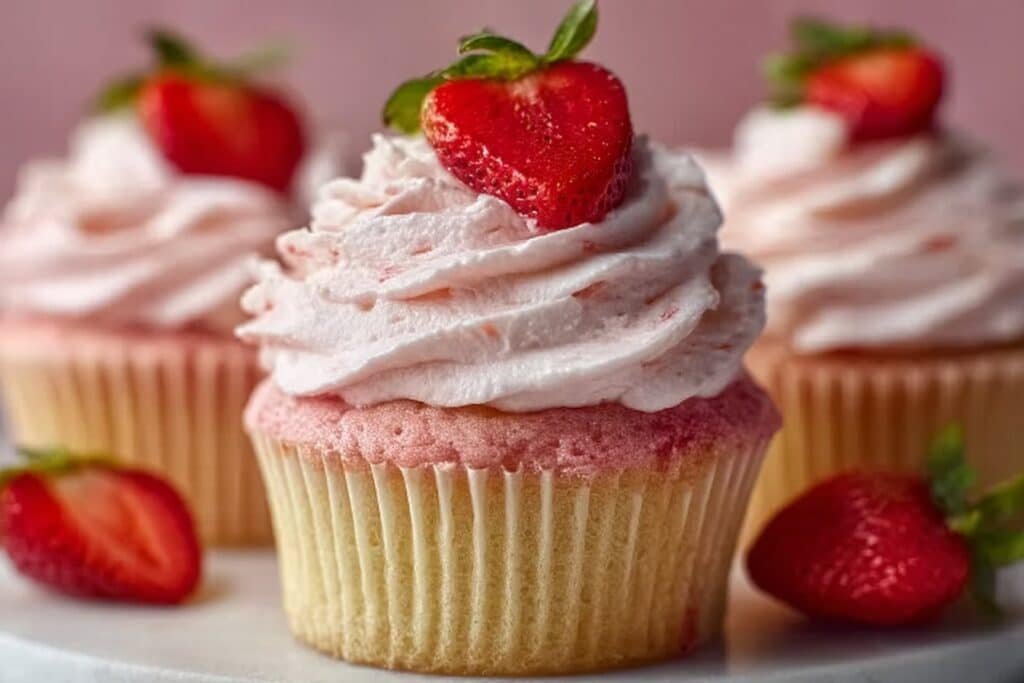
Now, you’ll bring in the “strawberry milkshake” magic. Cook the chopped strawberries with a bit of sugar over medium heat, stirring every minute or so, until they’re soft, glossy, and syrupy—you should be able to easily mash them with the back of a spoon. Let this strawberry puree cool slightly so it doesn’t melt the butter in your batter. Alternate the dry ingredients with the milk, starting and ending with dry, and mix just until you no longer see streaks of flour; overmixing here can turn tender cupcakes into dense little muffins. Gently fold in the cooled puree so you get an evenly pink batter, then scoop it into your lined pan, filling about 2⁄3 full—an ice cream scoop works perfectly and keeps all your cupcakes the same size. If you love a full “soda fountain” moment, you can pair these with a batch of classic vanilla cupcakes or even strawberry shortcake-inspired treats for a fun dessert spread.
Make-Ahead & Storage
These Strawberry Milkshake Cupcakes are wonderfully make-ahead friendly as long as you separate the components. For the best texture, bake the cupcakes up to 2 days in advance, let them cool completely, then store them in an airtight container at room temperature. Keep them away from direct sunlight or heat so the tender crumb doesn’t dry out. You can also make the strawberry puree and chill it for up to 3 days; give it a quick stir before folding into the batter if it separates slightly. If you’d like to get extra ahead, bake the cupcakes, cool them, and freeze them (unfrosted) on a sheet pan, then transfer to a freezer bag for up to 2 months.
For storage after frosting, treat these Strawberry Milkshake Cupcakes like you would a real milkshake—keep them cold. Because of the whipped cream topping, they need to be stored in the refrigerator in a covered container and enjoyed within 2–3 days for the best flavor and texture. The whipped cream will lose some of its structure over time, so if you’re serving for a party, I recommend frosting them the day of and adding the fresh strawberry garnish just before serving. To enjoy leftovers, let chilled cupcakes sit at room temperature for about 15 minutes so the cake softens and the “milkshake” flavors come back to life. And if you fall in love with this make-ahead method, it works beautifully for other whipped-cream topped treats, like layered strawberry shortcake cupcakes and vanilla bean birthday cupcakes.
Best Ingredients & Party Variations
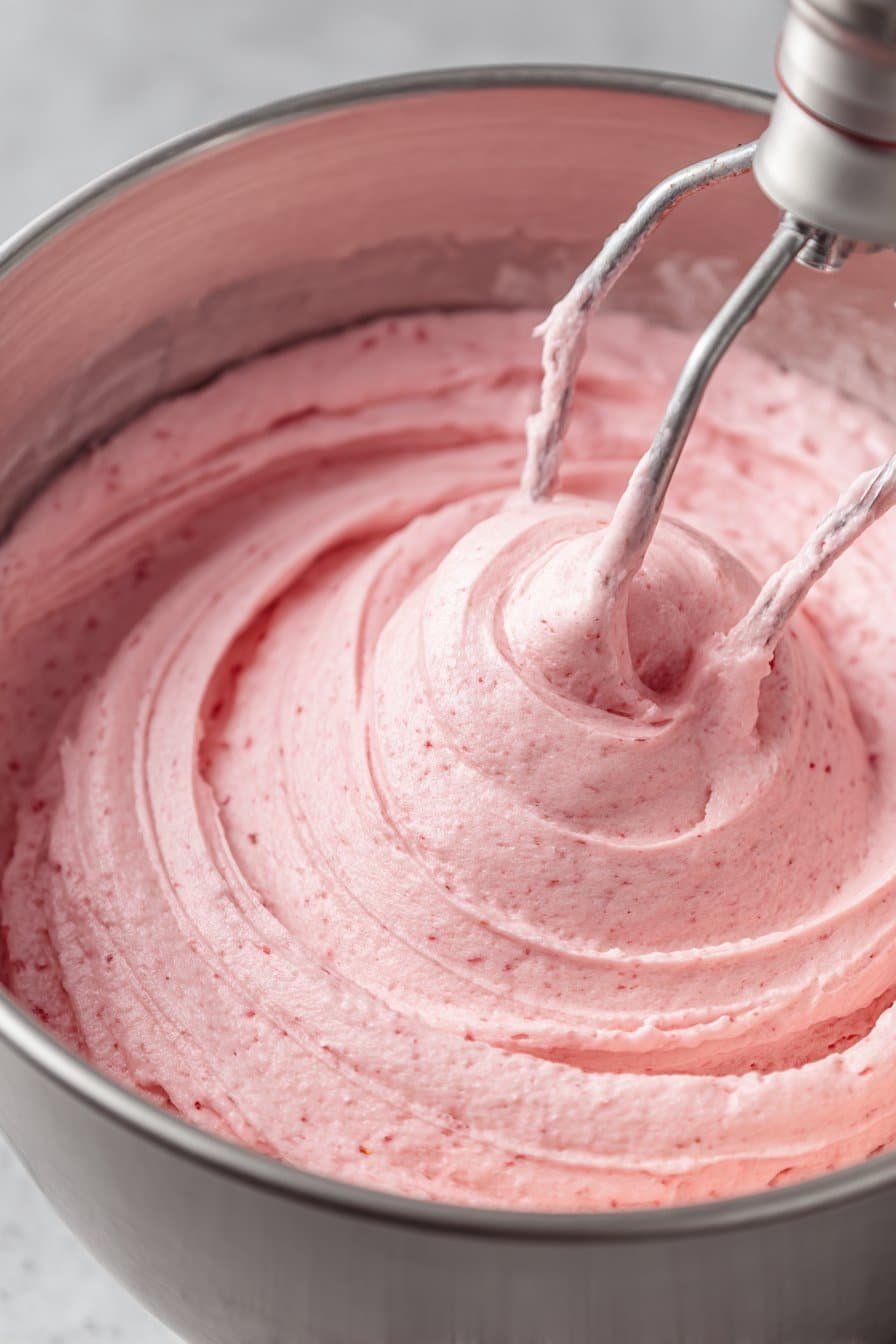
For the creamiest, most nostalgic Strawberry Milkshake Cupcakes, start with high‑fat, high‑flavor basics. Whole milk (not 2% or skim) really does make a difference here—it gives that classic diner-milkshake richness to the crumb. I like unsalted butter for control over the salt and a deep, buttery flavor that won’t fight the strawberries. Use ripe, sweet strawberries that actually smell like strawberries; if your berries are pale and bland, your puree will taste flat, so feel free to add an extra teaspoon of sugar or a splash of lemon juice to wake them up. Vanilla bean paste adds those gorgeous specks and a round, ice-cream-like flavor, but good-quality vanilla extract will still give you delicious Strawberry Milkshake Cupcakes if that’s what you have. And don’t swap the heavy cream in the frosting for half-and-half; you need at least 36% fat to whip up that soft, milkshake‑style cloud on top.
When it comes to party variations, treat these cupcakes like a dessert bar in bite-size form. For a “strawberry sundae” version, add mini chocolate chips to the batter and finish the frosted cupcakes with a drizzle of chocolate sauce and a cherry—kids go wild for these. For adults, fold in a tablespoon of strawberry jam to the batter and pipe a tall swirl of whipped cream, then garnish with sliced berries and crushed shortbread for a strawberries‑and‑cream vibe. You can turn them into neapolitan Strawberry Milkshake Cupcakes by baking them as-is, then adding a thin layer of chocolate ganache and topping with a swirl of whipped cream and a sprinkle of freeze‑dried strawberry powder. For easy serving at big gatherings, bake the batter as mini cupcakes and offer a few frostings—vanilla whipped cream, strawberry whipped cream, or even a light cream cheese topping—so guests can mix and match like their own little milkshake bar.
Serving of Strawberry Milkshake Cupcakes
Conclusion
If you’re anything like me, you’re already picturing a plate of these pretty pink treats on your kitchen counter, just waiting to be shared. There’s something so simple and sweet about baking a batch of cupcakes that taste like something straight out of an old-fashioned soda shop. These Strawberry Milkshake Cupcakes aren’t just dessert—they’re little invitations to slow down, pour a glass of cold milk, and make a small, happy memory with the people you love.
I hope you let this recipe be part of your everyday celebrations—birthdays, rainy afternoons, or just those “we made it through the week” moments. Bake them with your kids, your partner, your roommate, or all by yourself with your favorite playlist on. However you make them, I promise the batter-streaked bowls, the strawberry-scented kitchen, and that first creamy, frosted bite will be worth it.
When you do try them, come back and tell me how they turned out—I’d love to hear your twist.
For more delicious recipes like this, follow us on social media!
What makes Strawberry Milkshake Cupcakes unique?
Strawberry Milkshake Cupcakes blend fresh strawberry puree, whole milk, and vanilla bean to mimic the flavor of a classic diner strawberry milkshake. The batter bakes up extra soft and fluffy, almost like a light sponge instead of a dense cupcake. On top, you get billowy whipped cream frosting instead of heavy buttercream, which really leans into that “milkshake” vibe. Every bite feels creamy, fruity, and nostalgic, just like sipping a pink milkshake through a striped straw.
Can I use frozen strawberries for the strawberry puree?
You can absolutely use frozen strawberries in these Strawberry Milkshake Cupcakes. Let them thaw completely, then drain off any excess liquid so your puree isn’t watery. If the strawberries seem bland, cook them with the sugar just a minute or two longer to concentrate the flavor. Cool the puree fully before folding it into the batter, or it can melt the butter and make the cupcakes dense.
How should I store and make Strawberry Milkshake Cupcakes ahead?
Because of the whipped cream topping, store finished Strawberry Milkshake Cupcakes in an airtight container in the fridge. They taste best within 24–48 hours, but you can keep them up to 3 days. If you want to work ahead, bake the cupcakes a day in advance and keep them unfrosted at room temperature. Whip the cream and frost just before serving so the topping stays fluffy and picture-perfect.
Recipe
Strawberry Milkshake Cupcakes
Ingredients
Ingredients
- 1 1/2 cups all-purpose flour
- 1 cup granulated sugar
- 1/2 cup unsalted butter softened
- 2 large eggs at room temperature
- 1 cup whole milk at room temperature
- 2 teaspoons baking powder
- 1 teaspoon vanilla bean paste
- 1/2 teaspoon salt
- 1 cup fresh strawberries hulled and chopped
- 2 tablespoons granulated sugar
- 1 cup heavy whipping cream chilled
- 1/2 cup powdered sugar
- 1 teaspoon vanilla bean paste
- 6 fresh strawberries halved, for garnish
Instructions
- Preheat the oven to 350°F and line a 12-cup muffin pan with paper liners.
- In a small saucepan, combine the chopped strawberries and 2 tablespoons granulated sugar over medium heat, stirring often, and cook for 5 to 7 minutes until the berries are soft and syrupy.
- Mash the strawberries lightly with the back of a spoon, remove the pan from the heat, and let the puree cool to room temperature.
- In a medium bowl, whisk together the flour, baking powder, and salt until well combined, then set aside.
- In a large mixing bowl, beat the softened butter and 1 cup granulated sugar with a hand mixer or stand mixer on medium speed for 3 to 4 minutes until light and fluffy.
- Add the eggs to the butter mixture one at a time, beating well after each addition, then mix in 1 teaspoon vanilla bean paste until smooth.
- With the mixer on low speed, add the dry ingredients in 3 additions, alternating with the milk in 2 additions, beginning and ending with the dry ingredients, mixing just until combined.
- Gently fold the cooled strawberry puree into the batter with a spatula until the color is evenly distributed and no streaks remain.
- Divide the batter evenly among the cupcake liners, filling each about 2/3 full.
- Bake the cupcakes for 18 to 20 minutes, or until a toothpick inserted in the center comes out clean or with a few moist crumbs.
- Transfer the pan to a wire rack and let the cupcakes cool in the pan for 5 minutes, then remove them from the pan and cool completely on the rack.
- Once the cupcakes are completely cool, prepare the frosting by adding the cold heavy whipping cream, powdered sugar, and 1 teaspoon vanilla bean paste to a chilled mixing bowl.
- Beat the cream mixture on medium-high speed for 2 to 3 minutes until stiff peaks form and the whipped cream holds its shape.
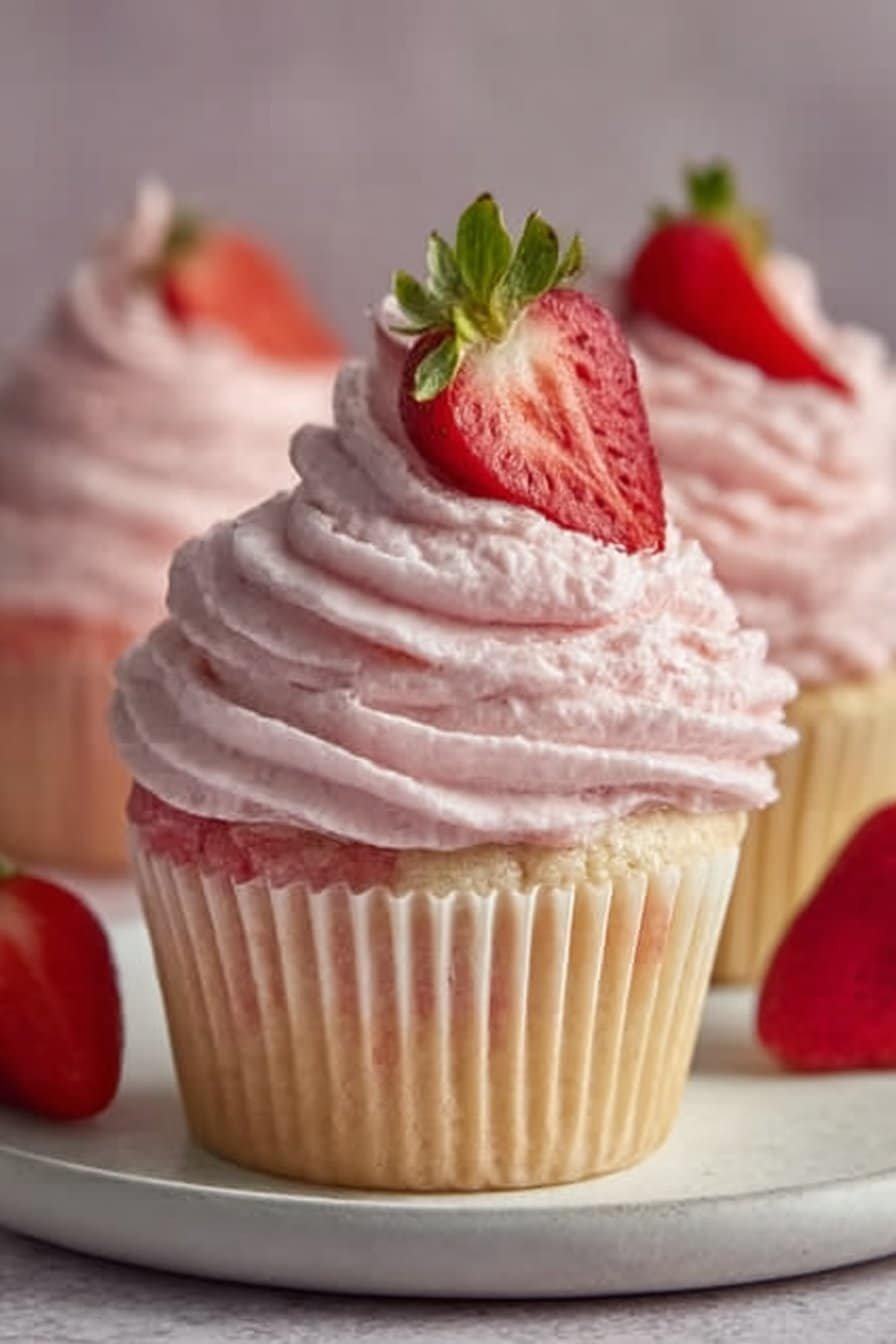
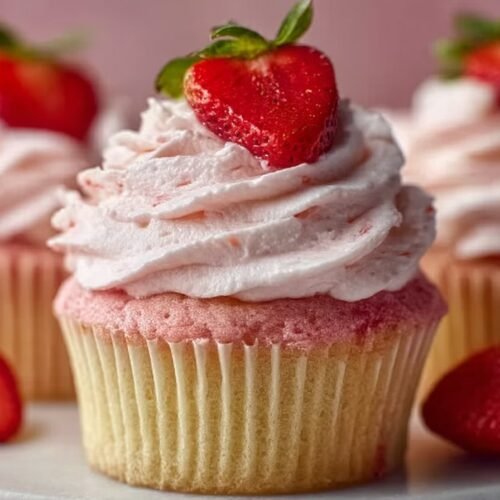
- Spoon or pipe the whipped cream frosting generously onto the cooled cupcakes.
- Garnish each cupcake with a halved fresh strawberry just before serving.
Notes
- For the best whipped cream, chill the bowl and beaters for 10 minutes in the refrigerator before whipping the cream.
- Store frosted cupcakes in the refrigerator for up to 2 days and add fresh strawberry garnish right before serving.
- Unfrosted cupcakes can be frozen in an airtight container for up to 2 months; thaw at room temperature before frosting.