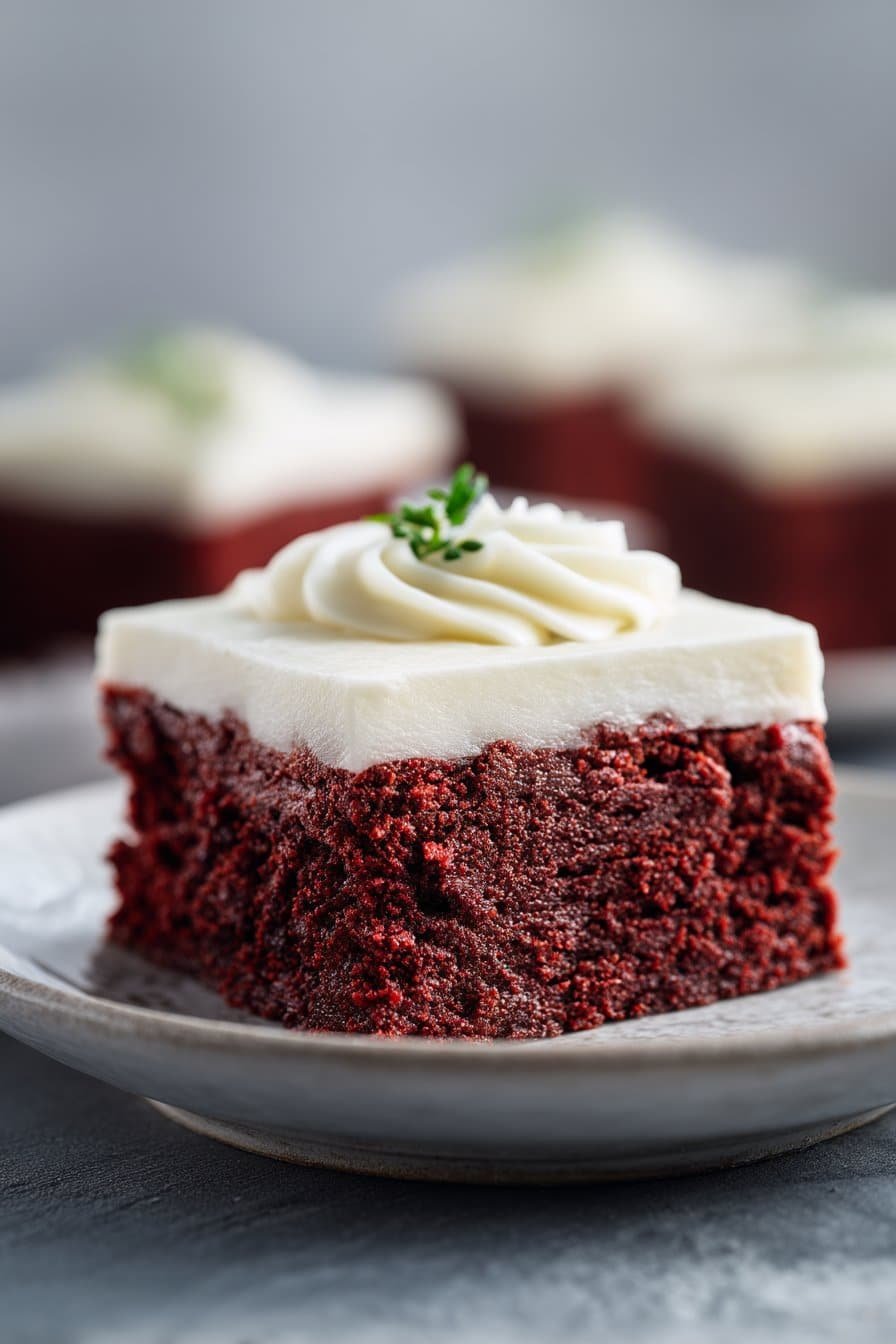
The Memory Behind This Treat
The first pan of these Velvet Brownies with Cream Cheese Frosting happened on one of those chaotic, “everyone’s coming over in an hour” afternoons. I remember staring into my pantry, realizing I didn’t have enough chocolate for classic fudgy brownies—but I did have cocoa powder, red food coloring, and a lonely block of cream cheese softening on the counter. So I took the familiar flavors of red velvet cake, skipped the cake layers, and pressed all that cocoa-vanilla goodness into one simple 8 x 8 pan. When I pulled them from the oven, the kitchen smelled like a bakery—warm butter, chocolate, and just a whisper of vanilla bean. By the time I slathered on that tangy frosting, people were already hovering with plates in hand.
These Velvet Brownies with Cream Cheese Frosting quickly became my “I’ve totally got this” dessert for last-minute dinners and holidays. My sister, who swears she’s “not really a dessert person,” requested them instead of birthday cake one year and asked for extra corner pieces—the ones with the chewy edge and the thickest swipe of frosting. I loved that I could get that festive red velvet look without messing with three cake pans, parchment circles, and leveling layers. One bowl for dry ingredients, one for wet, melted butter instead of creaming—it felt like cheating in the best possible way. Now, whenever I melt that 2/3 cup of butter and reach for the vanilla bean paste, I know I’m only about 40 minutes away from a pan that looks like a special-occasion dessert but feels as easy and cozy as weeknight brownies.
How To Make It (Mix & Ingredients)
For these Velvet Brownies with Cream Cheese Frosting, I like to set up my workspace before I even touch a mixing bowl. Pull out your butter, eggs, and cream cheese so they can come to room temperature; cold ingredients fight you, while softened ones blend into that silky, velvety texture you want. Whisk your dry ingredients together first—flour, cocoa powder, baking powder, and salt—so you’re not chasing streaks of cocoa through the batter later. In a separate bowl, whisk the eggs until slightly frothy, then beat in the sugar, vanilla bean paste, vinegar (if you’re using it for a little tang and lift), and red food coloring. The mixture should look glossy and deeply tinted before you add anything else.
Instructions Process of Velvet Brownies with Cream Cheese Frosting
Melt your butter and let it cool just enough that it won’t scramble the eggs—slightly warm is fine, hot is not. With your mixer on low or using a sturdy wooden spoon, slowly stream the butter into the egg mixture, stirring as you go so it fully emulsifies and doesn’t separate. Gently fold in the dry ingredients until just combined; the batter should be thick but pourable, and a few small lumps are better than overmixing, which leads to tough brownies. While the brownies bake and cool completely, beat the softened cream cheese and butter together until fluffy, then add powdered sugar, vanilla bean paste, and a tiny pinch of salt. You’re looking for a smooth, spreadable frosting that holds soft peaks—if it feels loose, chill it for 10–15 minutes before swirling it over your cooled pan of velvet brownies.
Make-Ahead & Storage
Velvet Brownies with Cream Cheese Frosting are very make-ahead friendly, which is good news if you’re baking for a party or just future-you. For the best texture, you can bake the brownie base up to 2 days in advance: let it cool completely, then wrap the uncut slab tightly in plastic wrap and store at room temperature. Make the cream cheese frosting the day you plan to serve, spread it over the brownies, and chill the pan for at least 30 minutes so the frosting can set before slicing. If you’d rather do it all at once, you can fully assemble the Velvet Brownies with Cream Cheese Frosting, cover the pan, and refrigerate for up to 3 days. Just know the red color will stay brightest within the first 48 hours.
For short-term storage, keep your frosted Velvet Brownies with Cream Cheese Frosting in an airtight container in the fridge; the cream cheese needs the cold, and the brownies stay wonderfully fudgy. Layer pieces with parchment if you’re stacking them so the frosting doesn’t glue everything together. When you’re ready to eat, let the brownies sit at room temperature for about 20–30 minutes—the frosting softens, the cocoa flavor blooms a bit, and they taste like you just baked them. You can also freeze individual, well-wrapped squares (frosted or unfrosted) for up to 2 months; thaw overnight in the fridge, then bring to room temp before serving. If you love freezer-friendly bakes, these store much like a frosted snack cake or cheesecake bars, which means they’re ideal for stashing alongside a batch of your favorite cookie bars.
Best Ingredients & Party Variations
When you’re making Velvet Brownies with Cream Cheese Frosting, a few ingredient choices turn “good” into “oh wow, who made these?” Use unsalted butter so you can control the salt, and make sure it’s fully melted but not hot, or you’ll scramble the eggs. I love a Dutch-process cocoa powder here for deeper color and flavor, but natural cocoa works if that’s what you have. Room-temperature eggs, cream cheese, and butter are non-negotiable for a velvety batter and a smooth, lump-free frosting. If you’re sensitive to food coloring, you can cut the red food coloring in half or swap to a gel version—which gives strong color with less liquid.
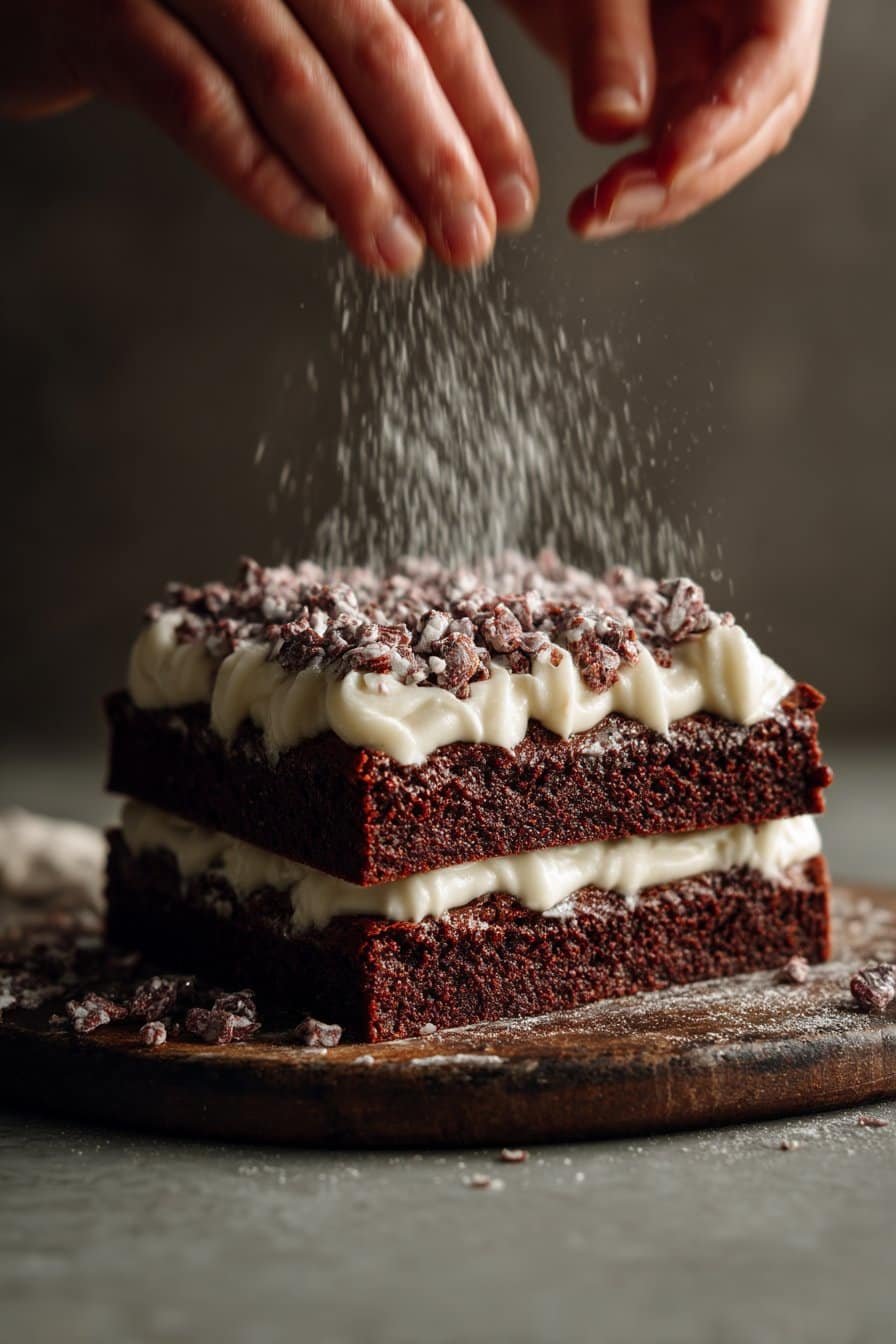
For parties, these Velvet Brownies with Cream Cheese Frosting are incredibly easy to dress up. Cut them into bite-size squares and top each with a mini chocolate chip or a raspberry for a pretty dessert-board moment. Swirl a spoonful of seedless raspberry jam into the frosting before spreading for a berry-kissed spin that pairs beautifully with the cocoa. For a birthday or holiday tray, add festive sprinkles on top right after frosting, or drizzle with melted dark chocolate for a more grown-up look. You can even bake the batter in a mini muffin tin for velvet brownie “bites,” then pipe a little rosette of cream cheese frosting on each for a one-handed party dessert that disappears fast.
Serving of Velvet Brownies with Cream Cheese Frosting
Conclusion
If you’re anything like me, these brownies won’t even make it to the next day. There’s just something about a pan of still-warm Velvet Brownies with Cream Cheese Frosting on the counter that pulls everyone into the kitchen. People wander in for “just a bite,” and suddenly you’ve got stories being told, forks clinking, and a plate of crumbs where a pan of brownies used to be. That’s the quiet magic of homemade dessert—it turns ordinary afternoons and weeknights into little celebrations.
I hope this recipe becomes one of those go-to treats you reach for when you want to show a little extra love—whether it’s for a birthday, a potluck, your kids’ after-school snack, or just yourself on a cozy night in. Don’t worry about making it perfect; focus on having fun, licking the spatula, and enjoying that first fudgy, frosted bite. You absolutely can do this, and I can’t wait for you to taste just how special they are.
For more delicious recipes like this, follow us on social media!
What makes these Velvet Brownies with Cream Cheese Frosting unique?
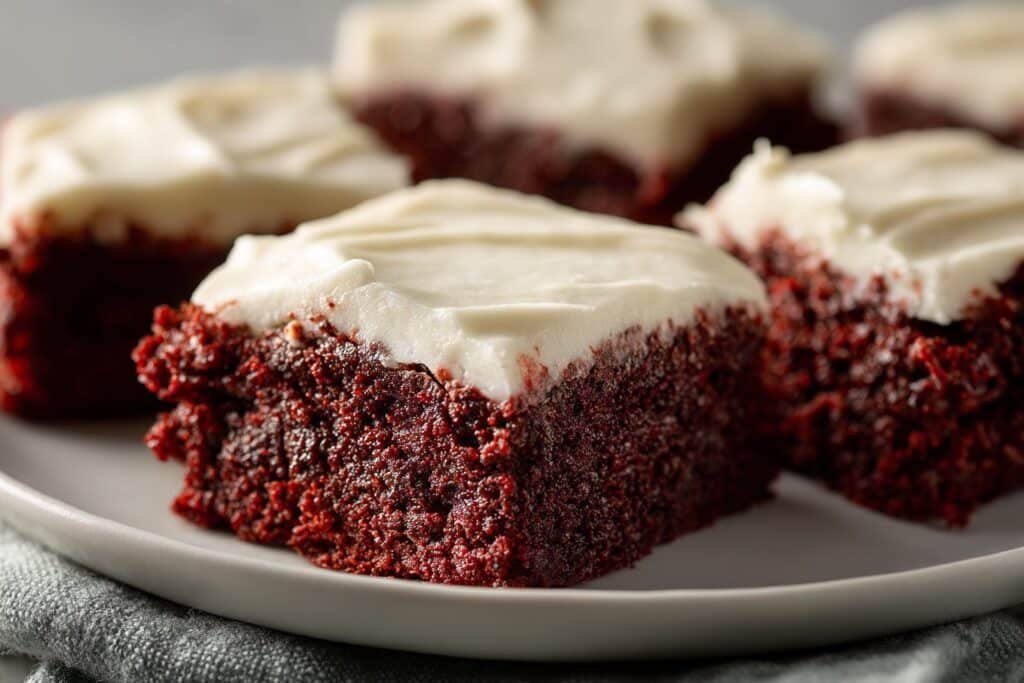
Velvet Brownies with Cream Cheese Frosting combine the fudgy comfort of a brownie with the tender, cake-like crumb of classic red velvet. You get just enough cocoa to taste chocolate, but not so much that it overpowers the tangy cream cheese frosting. The red color, vanilla, and touch of vinegar create that signature “velvet” texture and flavor. Together, the dense, moist brownie base and silky frosting feel like a dressed-up dessert that’s still easy enough for a weeknight bake. They’re the kind of treat that looks celebration-ready even when you’ve made them in an 8-inch pan in your cozy kitchen.
How can I get the best color and texture in my Velvet Brownies?
For bold color, use the full amount of red liquid food coloring or 1 teaspoon of red gel, which is more concentrated. The small amount of cocoa plus the vinegar helps deepen the hue and keep the crumb tender. Make sure your eggs are at room temperature so they whip up light and combine smoothly with the sugar and butter. Mix just until the dry ingredients are incorporated; overmixing can make the brownies tough instead of velvety. Bake until a toothpick comes out with a few moist crumbs, not completely clean, for that soft, rich texture.
How should I store Velvet Brownies with Cream Cheese Frosting, and can I freeze them?
Because of the cream cheese frosting, store these brownies in an airtight container in the refrigerator. They keep well for 4–5 days and taste best if you let them sit at room temperature for about 15–20 minutes before serving. To freeze, you can wrap the unfrosted brownie slab tightly in plastic and then foil, and freeze for up to 2 months. If you want to freeze them frosted, first freeze cut squares on a tray until solid, then transfer to a sealed container with parchment between layers. Thaw in the fridge overnight, then let them soften slightly on the counter before enjoying.
Recipe

Velvet Brownies with Cream Cheese Frosting
Ingredients
Ingredients
- 2/3 cup unsalted butter
- 1 cup all-purpose flour
- 2 tablespoons unsweetened cocoa powder
- 1 teaspoon baking powder
- 1/2 teaspoon fine sea salt
- 2 large eggs room temperature
- 1 cup granulated sugar
- 1 teaspoon pure vanilla bean paste
- 1 teaspoon white vinegar optional
- 1 tablespoon red liquid food coloring or 1 teaspoon red gel food coloring
- 1/3 cup unsalted butter room temperature
- 8 ounces cream cheese room temperature
- 1/2 cup powdered sugar
- 1 teaspoon pure vanilla bean paste
- Pinch fine sea salt
Instructions
- Preheat the oven to 350°F. Grease an 8x8-inch square baking dish.
- Melt 2/3 cup unsalted butter in a microwave-safe bowl and set aside to cool slightly.
- In a medium bowl whisk together the flour, cocoa powder, baking powder, and 1/2 teaspoon fine sea salt; set aside.
- In a large bowl whisk the eggs until frothy, then add the granulated sugar, 1 teaspoon vanilla bean paste, white vinegar if using, and red food coloring. Beat with a handheld mixer or wooden spoon until well combined and glossy.
- Slowly pour the cooled melted butter into the egg mixture while mixing on low speed until smoothly combined.
- Add the dry ingredients to the wet ingredients and mix on low speed just until no dry streaks remain, without overmixing.
- Pour the batter into the prepared baking dish, spread into an even layer, and bake for 28 minutes or until a toothpick inserted in the center comes out clean or with a few moist crumbs.
- Remove the pan from the oven and cool the brownies completely on a wire rack.
- For the frosting, beat 1/3 cup softened butter and the cream cheese together in a large bowl on low speed until smooth and creamy.
- Gradually add the powdered sugar while mixing on low speed until incorporated, then increase to medium-high and beat until light and fluffy.
- Add 1 teaspoon vanilla bean paste and a pinch of fine sea salt to the frosting and mix until fully combined and smooth.
- Spread the cream cheese frosting evenly over the cooled brownie surface.
- Cut into 9 squares and serve.
Notes
- Store frosted brownies covered in the refrigerator for up to 3 days; bring to room temperature for 15–20 minutes before serving.