The Memory Behind This Treat
The very first time I tested these Red Velvet Brownie Bites, I wasn’t trying to develop a recipe at all—I was trying to save a broken one. I had a pan of slightly overbaked red velvet brownies on my counter (we’ve all been there), edges a bit too crisp, center not quite fudgy enough. Instead of tossing them, I cut off the best pieces, pressed them into mini muffin tins, and spooned in a bit of sweetened cream cheese. Ten minutes later, I pulled out these tiny, crackly-topped bites with soft, tangy centers that tasted like a cross between red velvet cake and cheesecake. I remember standing over the stove, eating one too hot, with the cream cheese just on the edge of molten, and thinking, “Okay…this isn’t a rescue anymore. This is the whole point.”
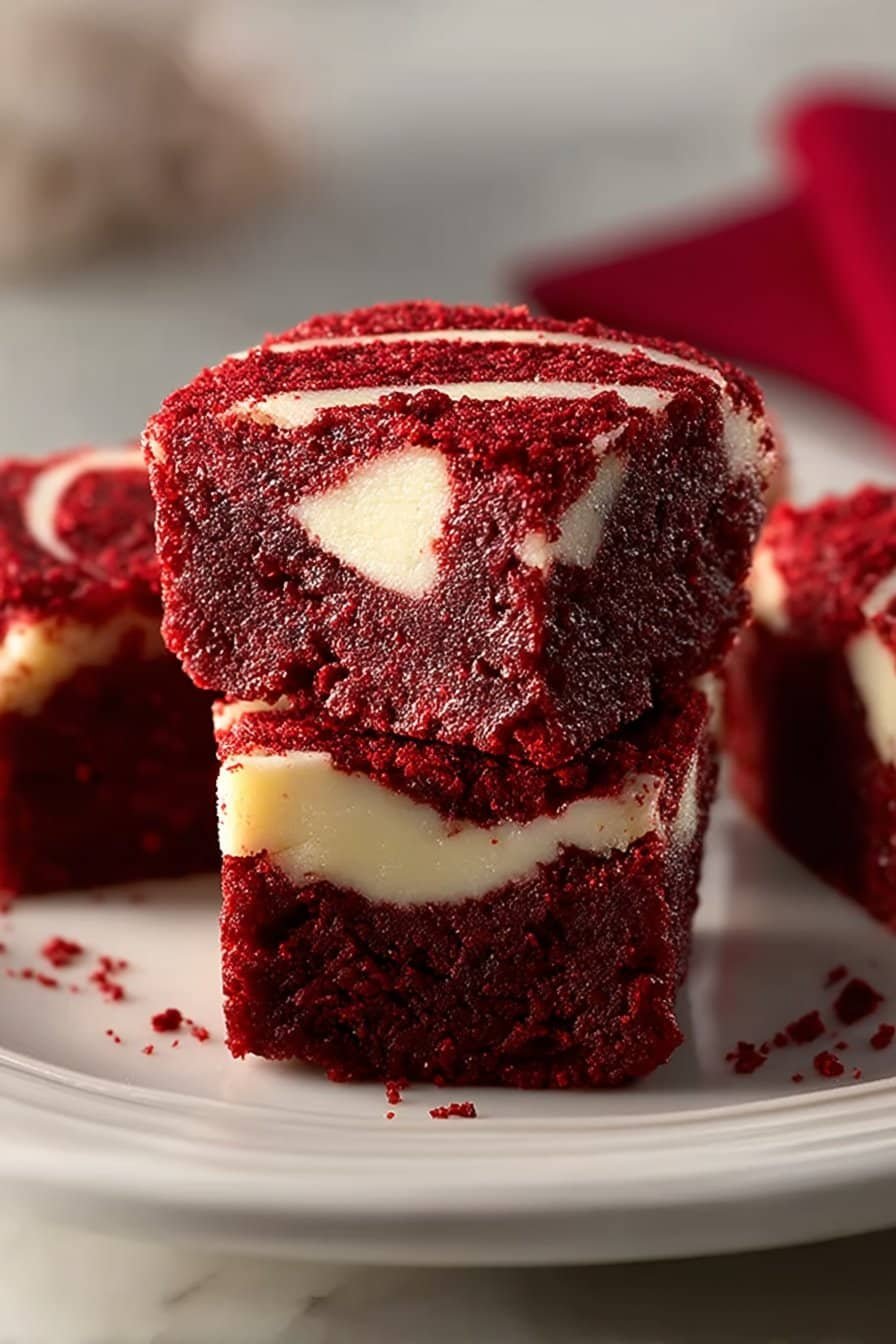
These little brownies also earned their place in my family the year my oven betrayed me on Valentine’s Day. I’d promised “something red velvet” for dessert, but between dinner dishes, kids running through the kitchen, and a last-minute search for cocoa powder, there was no time for a full layer cake. So I reached for my trusty square pan, melted butter and cocoa together, stirred in sugar and that dramatic red food coloring, then swirled in ribbons of cream cheese. Instead of cutting big squares, I used a small round cutter and turned the slab into bite-sized treats you could pop in one go—no forks, no crumbs down the couch. By the end of the night, my plate of Red Velvet Brownie Bites was empty, my kitchen smelled like warm cocoa and vanilla, and I knew this would be my go-to “I need something special, fast” dessert for years.
How To Make It (Mix & Ingredients)
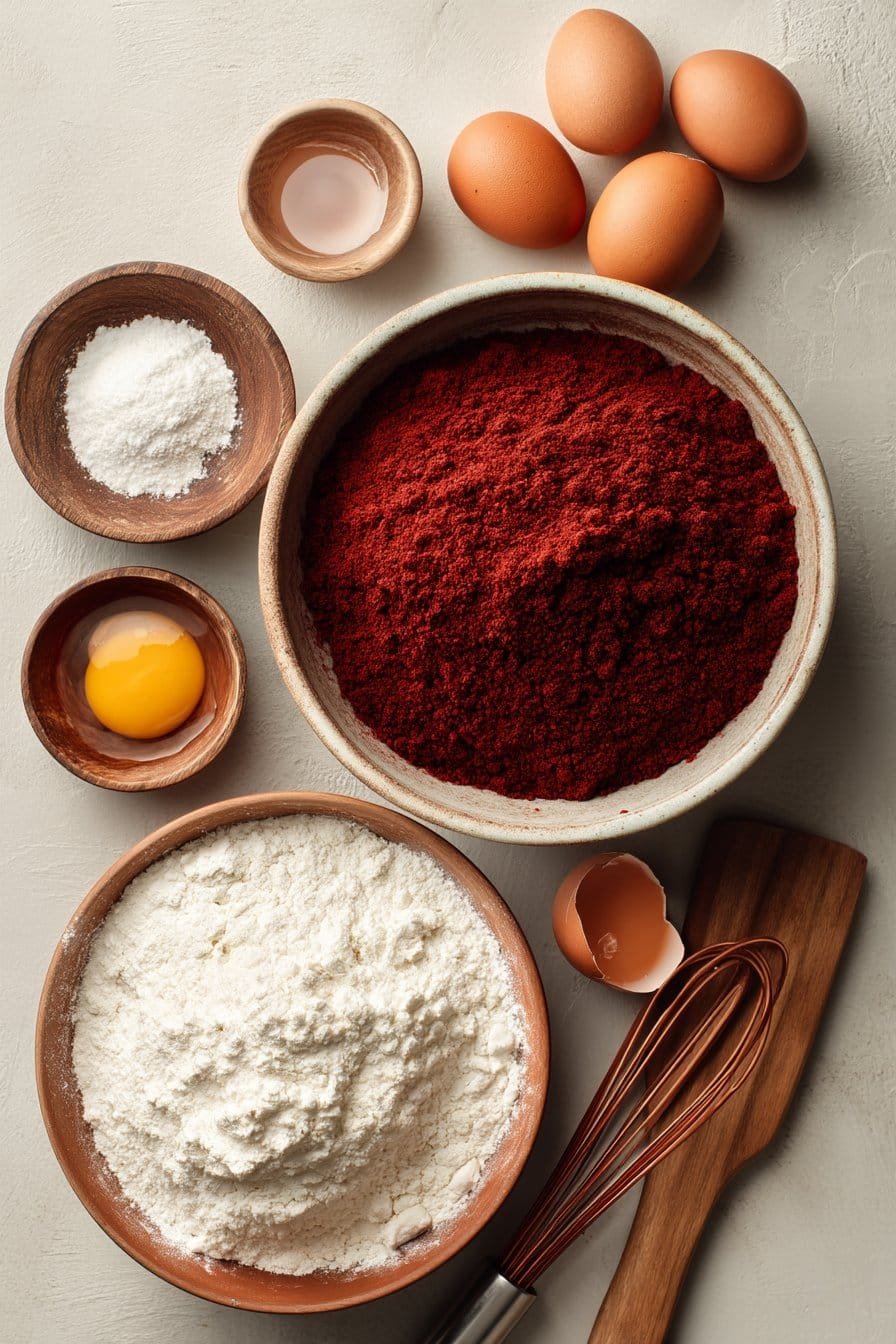
To get these Red Velvet Brownie Bites just right, you’ll start by building a rich, velvety base. Melt the butter gently (stovetop on low or in the microwave in 15-second bursts), then whisk in the sugar until it looks thick and grainy, almost like wet sand. Sift in the cocoa powder so you don’t end up with bitter little pockets, then add the vanilla, red food coloring, salt, espresso powder, and vinegar. The vinegar might sound strange, but it helps deepen the color and gives that classic red velvet tang. Once the mixture cools slightly, whisk in the eggs one at a time so they don’t scramble. Fold in the flour just until you no longer see streaks—if you keep stirring, you’ll lose that fudgy brownie bite texture.
Instructions Process of Red Velvet Brownie Bites
For the cream cheese swirl, make sure your cream cheese is truly room temperature; it should feel soft when you press it with a finger, not cool and firm. Beat it with the sugar, vanilla, and egg yolk until smooth and glossy, with no lumps. If you still see a few tiny bits, give it another 20–30 seconds with the mixer or a vigorous whisk. Spoon your red velvet batter into a mini muffin pan, filling each cup about 3/4 full, then dot the tops with small spoonfuls of cream cheese mixture. Use a toothpick or skewer to gently swirl, giving each bite a marbled look rather than mixing it all together. Bake until the edges look set but the centers still look slightly soft—this keeps your Red Velvet Brownie Bites fudgy instead of dry.
Make-Ahead & Storage
Red Velvet Brownie Bites are a dream make-ahead dessert because the flavors actually deepen after a rest. If you’re planning ahead for a party or holiday tray, bake the bites completely, cool them to room temperature, then chill the pan (or a container) for at least 2 hours before slicing or serving. The cream cheese swirl firms up in the fridge, which gives you cleaner bites and that perfect fudgy–tangy contrast. Store them in an airtight container in the refrigerator, layering with parchment if you stack them, for up to 5 days. When you’re ready to serve, let them sit at room temperature for about 20–30 minutes so the butter and cream cheese soften slightly and the texture turns wonderfully fudgy again.
For longer storage, these Red Velvet Brownie Bites freeze better than you might think. Chill them first so the swirl sets, then wrap individual bites tightly in plastic wrap and place them in a freezer-safe bag or container, squeezing out as much air as possible. Label with the date (future you will thank you) and freeze for up to 2 months. To thaw, move a few bites to the fridge overnight, then bring them to room temperature before serving—or enjoy them slightly chilled if you like a firmer, chewier bite. If you’re assembling a dessert board with other treats like cheesecake bars or chocolate chip blondies, you can pull out just as many pieces as you need, which makes these a super flexible dessert to keep on hand.
Best Ingredients & Party Variations
For the best Red Velvet Brownie Bites, start with quality basics. I love using unsalted butter (Kerrygold if you can swing it) because it gives you that rich, bakery-style flavor and lets you control the salt. A good Dutch-process cocoa powder will deepen both the color and the chocolate flavor, so your bites taste like real brownies, not just red cake squares. Bring your cream cheese fully to room temperature (about 70°F); if it’s even a little cold, your swirl will look lumpy instead of glossy and smooth. And don’t skip the tiny bit of vinegar and espresso powder—they quietly boost the chocolate and balance the sweetness so each bite tastes complex, not flat.
Once you have a great base, you can spin these Red Velvet Brownie Bites into a whole dessert platter. For a party sprinkle version, press rainbow or red-and-white sprinkles gently on top right before baking; they melt just enough to cling but still look cheerful. For adults, swirl a teaspoon of Baileys or Kahlúa into the cream cheese mixture for a subtle, boozy note—perfect for holiday cocktail nights. You can also bake them in mini muffin tins for one-bite treats, then top each with a tiny dollop of whipped cream and a single chocolate chip. If you like texture, fold in mini chocolate chips or chopped white chocolate, keeping it to about 1/2 cup so the batter still bakes up fudgy.
For a more decorated dessert table, turn your Red Velvet Brownie Bites into sandwich bites: slice them in half horizontally and add a thin layer of cream cheese frosting or vanilla buttercream in the middle. For Valentine’s Day or anniversaries, bake the batter in a shallow pan, punch out hearts with a cookie cutter, and drizzle melted white chocolate over the top. If you’re hosting a mixed crowd, pair these with something simple and contrasting, like classic chocolate chip cookies or sugar cookies, so everyone has a sweeter or milder option. However you dress them up, keep the base recipe as written—that dense, tangy, crimson square is what makes these feel special on any dessert table.
Serving of Red Velvet Brownie Bites
Conclusion
There’s something a little magical about watching a plate of tiny desserts disappear, and these Red Velvet Brownie Bites have that effect every single time. They’re the kind of treat that turns an ordinary afternoon into “remember when…” moments, whether you’re packing them into lunch boxes, plating them for a party, or sneaking one (or two) with a late-night cup of tea. I love how the swirl of rich cocoa and tangy sweetness always makes people pause for just a second before they take that first, happy bite.
I hope this recipe finds its way into your own celebrations—big and small. Bake a batch for a birthday, bring them to the office, or make them just because a Tuesday needed a little extra sweetness. That’s the beauty of baking at home: you get to stir up your own comfort, share it with the people you love, and create new traditions along the way.
For more delicious recipes like this, follow us on social media!
What makes these Red Velvet Brownie Bites unique compared to regular brownies?
These Red Velvet Brownie Bites combine the dense, fudgy texture of a brownie with the classic tang and gentle cocoa flavor of red velvet cake. The vibrant red color makes them feel a bit more festive and special, especially for holidays or parties. A creamy cream cheese swirl runs through the batter, adding richness and a slight tang you do not get in standard brownies. Because they are bite-sized, you get the perfect ratio of brownie to cheesecake in every piece. They are also faster to bake and cool than a full pan of traditional brownies, which makes them great for last‑minute dessert cravings.
Can I substitute ingredients like butter, food coloring, or espresso powder?
You can use any good‑quality unsalted butter in place of Kerrygold; just avoid salted butter so you keep control over the salt level. For the red color, you can swap in natural red food coloring, but you may need a bit more to achieve the same vibrant shade. If you are sensitive to food dyes, you can even reduce the coloring and aim for a deeper cocoa brownie with just a reddish hue. The espresso powder is optional but highly recommended because it boosts the chocolate flavor without making the bites taste like coffee. If you skip it, the recipe still works; your Red Velvet Brownie Bites will just have a slightly more subtle chocolate note.
How do I get a smooth cream cheese swirl and the right brownie texture?
Start with cream cheese at true room temperature, about 70°F, so it beats smooth and blends easily without little lumps. Beat the cream cheese mixture until it is silky, then dollop small spoonfuls over the brownie batter and gently swirl with a knife or skewer—do not overmix or you will lose the marbled look. For the brownie base, measure the flour lightly (spooned into the cup and leveled) to avoid a dry, cakey texture. Bake just until the edges are set and the centers look slightly soft; they will firm up as they cool. If a toothpick comes out with a few moist crumbs but no wet batter, your Red Velvet Brownie Bites are done.
Recipe

Homemade Red Velvet Brownie Bites
Ingredients
Ingredients
- 9 tbsp unsalted butter melted and slightly cooled
- 1 1/4 cups granulated sugar
- 1/4 cup unsweetened cocoa powder sifted
- 1/2 tsp vanilla bean paste
- 1 tbsp red liquid food coloring
- 1/8 tsp salt
- 1/4 tsp espresso powder
- 1/2 tsp white vinegar
- 2 large eggs at room temperature
- 3/4 cup all-purpose flour
- 9 oz cream cheese softened to room temperature
- 3 tbsp granulated sugar
- 1/2 tsp vanilla bean paste
- 1 large egg yolk
Instructions
- Preheat the oven to 350°F and lightly grease a 24-cup mini muffin pan or line with mini paper liners.
- In a medium bowl, whisk together the melted butter and 1 1/4 cups sugar until thick and grainy.
- Whisk in the cocoa powder until smooth and fully combined.
- Add 1/2 tsp vanilla, red food coloring, salt, espresso powder, and vinegar, whisking until the mixture is evenly colored.
- Let the mixture cool slightly, then whisk in the eggs one at a time, mixing well after each addition.
- Add the flour and fold gently with a spatula just until no dry streaks remain; do not overmix.
- In a separate bowl, beat the cream cheese with 3 tbsp sugar until smooth and creamy.
- Add 1/2 tsp vanilla and the egg yolk to the cream cheese mixture and beat until smooth and glossy.
- Spoon the red velvet batter into the prepared mini muffin cups, filling each about three-quarters full.
- Dollop a small spoonful of the cream cheese mixture on top of each cup of batter.
- Use a toothpick or skewer to gently swirl the cream cheese into the red velvet batter to create a marbled pattern.
- Bake for 9 to 11 minutes, until the edges are just set and the centers are slightly soft but no longer wet.
- Remove the pan from the oven and let the brownie bites cool in the pan for 10 minutes.
- Carefully remove the brownie bites from the pan and transfer them to a wire rack to cool completely before serving or chilling.
Notes
- Do not overbake; slightly soft centers will firm up as they cool and keep the brownie bites fudgy.
- Chill the cooled brownie bites for 1 to 2 hours for the cleanest texture and more defined cream cheese swirl.
- Store in an airtight container in the refrigerator for up to 5 days or freeze for up to 2 months.