
The Memory Behind This Treat
The very first time I made this Valentine’s Oreo Bark, I wasn’t planning anything fancy. It was one of those February evenings when the day had run away from me, and I suddenly realized I had promised a “special dessert” for movie night. I remember standing in the kitchen, staring at a half-empty package of Oreos, a bag of white chocolate chips, and a handful of forgotten heart sprinkles from Christmas clearance. No heavy mixer to drag out, no cake pans to grease—just a baking sheet, parchment, and the microwave. In less than half an hour, my counters were dusted with cookie crumbs, the house smelled like warm vanilla and cocoa, and I had a tray of swirly pink and white bark that looked like I’d actually planned ahead.
.ai-toc .toc-h3 { margin-left: 12px; list-style-type: circle; } .ai-toc a { text-decoration: none; } .ai-toc a:hover { text-decoration: underline; } .ai-toc summary::-webkit-details-marker { display:none; }What I love most about this Valentine’s Oreo Bark is how it feels playful and low-pressure, the way Valentine’s Day should feel. When my kids were younger, I’d set out bowls of crushed Oreos, melted chocolate, and sprinkles, then let them “decorate” the bark however they wanted. Sometimes the drizzles were more like blobs, sometimes every inch was buried under sprinkles, but it always turned out charming and very quickly devoured. These days, I still pull this recipe out when I want something festive without fuss—no tempering chocolate, no precise cutting, just chill and break into pieces. It’s the kind of treat you can throw together after work, bring to a classroom party, or pair with a cozy pan of brownies for an easy dessert spread that tastes like you tried a whole lot harder than you actually had to.
How To Make It (Mix & Ingredients)
To make this Valentine’s Oreo Bark, you’ll only need a handful of simple ingredients and one sheet pan. Start by crushing 24 Oreo cookies – I like to pop them into a zip-top bag and use a rolling pin so you get a mix of chunky bits and sandy crumbs. Next, melt 2 cups of white chocolate chips in a microwave-safe bowl in 30-second bursts, stirring between each round so the chocolate doesn’t seize or scorch. When it’s smooth and glossy, pour it onto a parchment-lined baking sheet and spread it into about a 1/4-inch thick layer; thin enough to snap, but thick enough to hold all those cookies and sprinkles. Immediately sprinkle half of the crushed Oreos over the warm chocolate so they sink in just a bit.

Instructions Process of Valentine’s Oreo Bark
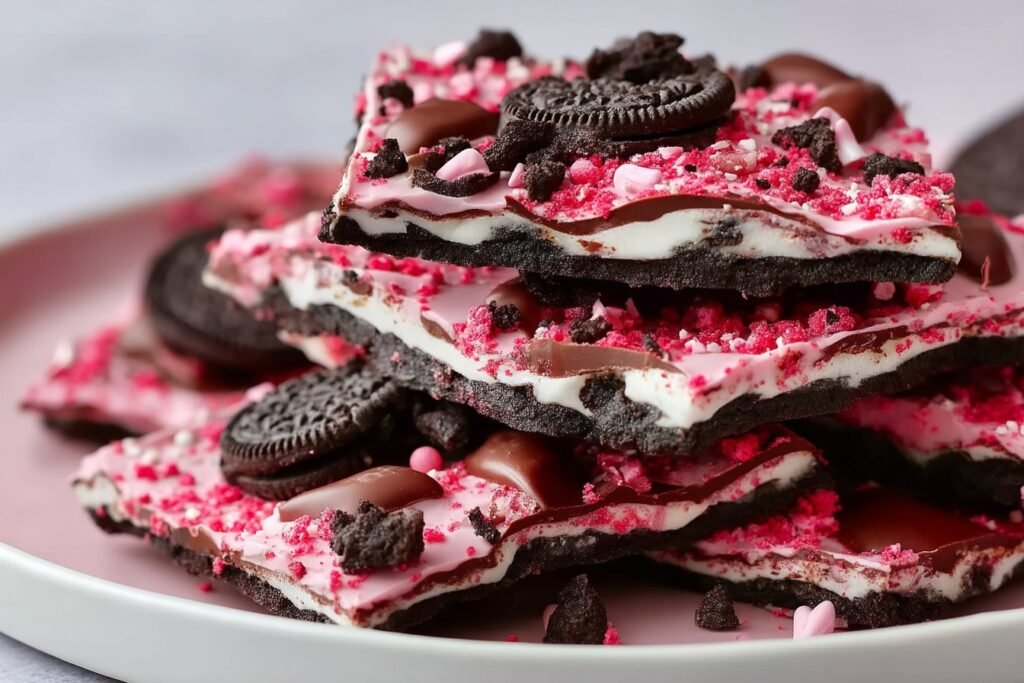
Now it’s time for the fun, swirly part. Melt 1 cup of pink or red candy melts in the same careful way, stirring until silky. Drizzle the melted candy melts over the white chocolate base in zigzags, then take a toothpick or skewer and gently swirl the colors together for that marbled Valentine’s look (think conversation hearts but in chocolate form). While everything is still wet, add the remaining Oreo crumbs plus a generous handful of heart-shaped sprinkles over the top. Slide the pan into the fridge for about 30 minutes, or until the bark is completely set and firm to the touch, then break it into uneven pieces—the more rustic, the better. If you’ve ever made holiday peppermint bark, this Valentine’s Oreo Bark will feel just as easy, but a lot more playful and romantic.
Make-Ahead & Storage
Valentine’s Oreo Bark is a dream when you’re trying to get ahead of the holiday rush. You can make the whole batch 3–5 days in advance and store it at room temperature in an airtight container. Separate layers with parchment or wax paper so the pieces don’t fuse together or transfer too many crumbs to the white chocolate. Keep the container in a cool, dry spot—think pantry or a cupboard away from the oven—because white chocolate and candy melts can develop soft spots if the kitchen gets too warm. If your house tends to run hot, you can store the bark in the fridge, but let it sit out for about 10–15 minutes before serving so the flavors soften and the chocolate loses that fridge chill.
For best texture and flavor, try to enjoy your Valentine’s Oreo Bark within 1 week. The bark will technically last longer, but the Oreos slowly soften as they sit against the melted chocolate and lose that satisfying crunch. To freeze, place the broken pieces on a lined baking sheet, freeze until solid, then transfer them to a freezer bag or airtight container with parchment between layers. They’ll keep well for up to 2 months; just thaw them in the fridge, then bring to room temperature before serving so the white chocolate doesn’t sweat. If you’re building a Valentine’s dessert board with this bark and other sweets like strawberry shortcake bars or red velvet cookies, store each treat separately, then assemble everything just before serving for the prettiest presentation and best texture.
Best Ingredients & Party Variations
For the best Valentine’s Oreo Bark, start with fresh, crisp Oreos so they keep that satisfying crunch under the chocolate. I like to use good-quality white chocolate chips or a white baking bar, because real cocoa butter melts smoother and tastes less waxy than cheap candy coating. Candy melts earn their spot too: pink or red melts give you that dreamy marbled look without fussing with food coloring. Go for heart-shaped sprinkles that are flat and not too hard, so they don’t compete with the cookie texture. If you want to dress it up even more, add a pinch of flaky sea salt on top right before chilling to balance the sweetness and make all the flavors pop.
Once you’ve nailed the base, this Valentine’s Oreo Bark turns into an easy party canvas. For a kids’ classroom party, mix in a handful of mini marshmallows and use mostly pink sprinkles for a softer, playful vibe. Hosting a grown-up Valentine’s or Galentine’s? Add roughly chopped dark chocolate and crushed freeze-dried raspberries for a slightly more “dessert bar” feel. You can also make a conversation-heart bark version by swapping some of the Oreos for chalky conversation hearts and using more white chocolate to keep everything from feeling too sweet. For gifting, pour the bark a bit thicker, let it set fully, then break into generous shards and tuck them into clear treat bags tied with red ribbon—instant edible Valentine.

Serving of Valentine’s Oreo Bark
Conclusion
Every time I break a piece of this bark and see those little pops of red, pink, and Oreo peeking through, I’m reminded that it doesn’t take much to make an ordinary day feel special. A handful of ingredients, a baking sheet, and a few minutes together in the kitchen can turn into giggles, sticky fingers, and a sweet memory you’ll talk about long after the treats are gone. That’s the real magic behind this Valentine’s Oreo Bark.
Whether you’re making it with kids, surprising a partner, or packaging it up for friends and coworkers, this is one of those easy wins that looks far more impressive than the effort it requires. I hope you feel inspired to clear a little space on your counter, melt some chocolate, and create a tray of love-loaded bark that’s perfectly “you.” When you do, I’d love to hear how it turned out and who you shared it with—those stories are my favorite part of what I do here on Taste to Rate.
For more delicious recipes like this, follow us on social media!
What is Valentine’s Oreo Bark made of?
Valentine’s Oreo Bark is a no-bake chocolate candy made from melted white chocolate, crushed Oreo cookies, colorful candy melts, and festive heart-shaped sprinkles. You spread the white chocolate into a thin layer, then scatter in the Oreos for crunch and chocolatey flavor. The pink or red candy melts add those pretty Valentine swirls and an extra hint of sweetness. Once it sets, you break it into rustic shards for an easy, shareable dessert. It’s basically a love letter written in chocolate and cookies.
How do I crush the Oreos for the best texture?
Place the Oreos in a zip-top bag, press out the extra air, and seal it well. Use a rolling pin or the bottom of a heavy pan to gently crush them, moving back and forth until you have a mix of larger chunks and sandy crumbs. Aim for about half chunky pieces (for big bites of cookie) and half finer crumbs (so they nestle into the chocolate). Avoid grinding them into dust—too fine and the bark can look muddy instead of pretty. If you prefer less mess, you can pulse them a few times in a food processor, but stop before they turn into powder.
How can I keep the white chocolate from burning or seizing?
Use a microwave-safe bowl and heat the white chocolate chips in short 20–30 second bursts, stirring very well between each burst. Stop heating when most chips are melted and let the residual heat finish melting the last few pieces as you stir. Make sure your bowl and utensils are completely dry; even a drop of water can make white chocolate seize and become grainy. If the chocolate looks too thick, you can add 1–2 teaspoons of neutral oil to help smooth it out. Work steadily but don’t rush—slow and gentle heat gives you glossy, smooth Valentine’s Oreo Bark.

Valentine's Oreo Bark
Ingredients
Main Ingredients
- 24 pieces Oreo cookies Crushed for the recipe
- 2 cups white chocolate chips For the base
- 1 cup red or pink candy melts For swirling
- 1 cup heart-shaped sprinkles For decorating
Instructions
Preparation
- Crush 24 Oreo cookies by placing them in a zip-top bag and using a rolling pin to get a mix of chunky bits and sandy crumbs.
- Melt 2 cups of white chocolate chips in a microwave-safe bowl in 30-second bursts, stirring between each round until smooth.
- Pour the melted white chocolate onto a parchment-lined baking sheet, spreading it into a 1/4-inch thick layer.
- Sprinkle half of the crushed Oreos over the warm chocolate, allowing them to sink in slightly.
Decoration
- Melt 1 cup of pink or red candy melts in short bursts, stirring until smooth.
- Drizzle the melted candy melts over the white chocolate base in zigzags.
- Use a toothpick to gently swirl the colors together.
- Add the remaining Oreo crumbs and a generous handful of heart-shaped sprinkles over the top.
Setting
- Refrigerate the pan for about 30 minutes or until the bark is firm to the touch.
- Once set, break the bark into rustic pieces.


