The Memory Behind This Treat
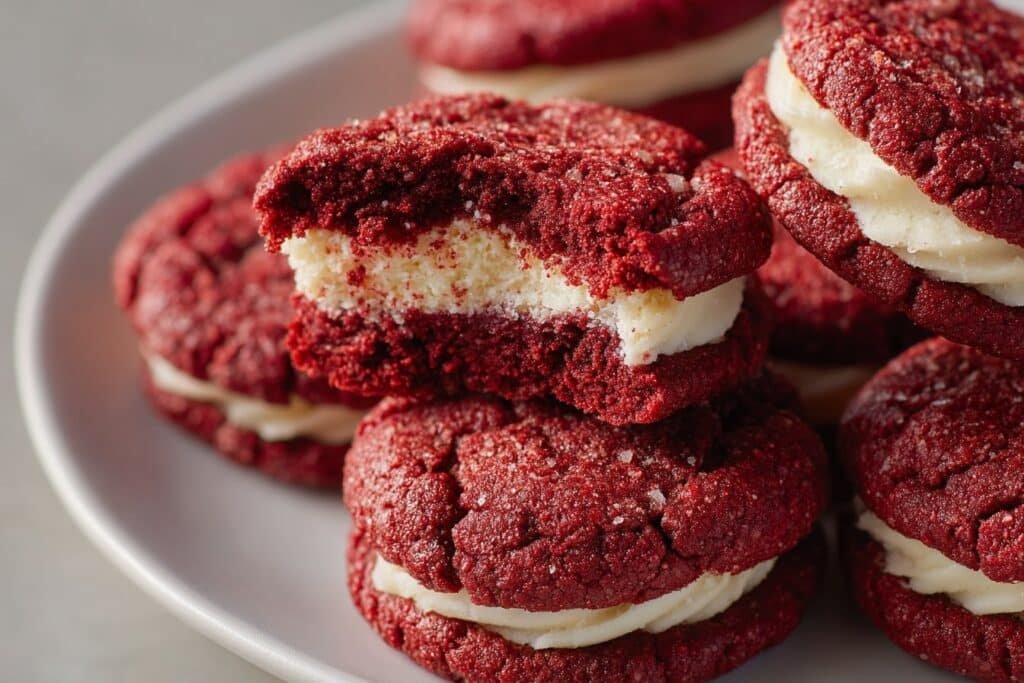
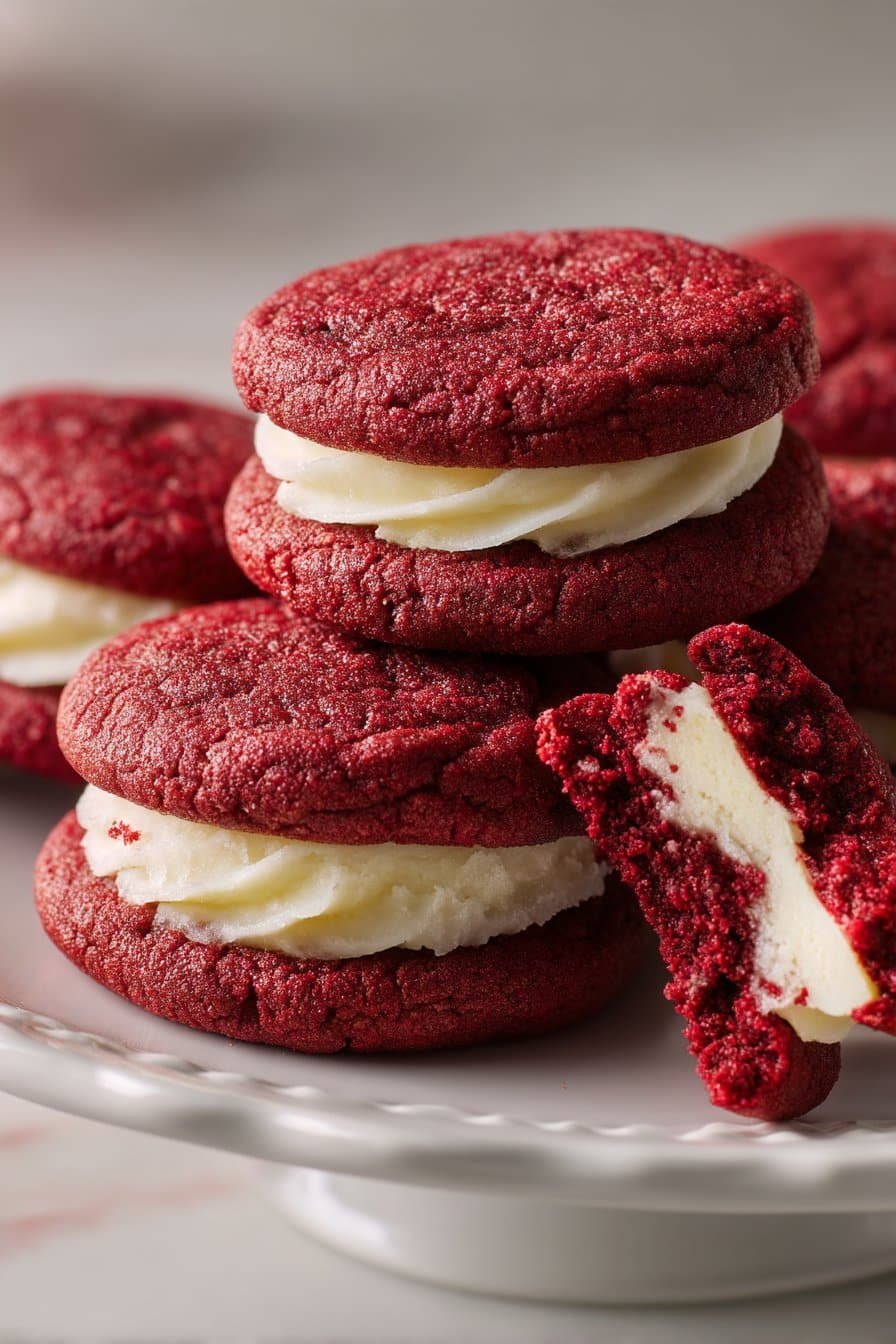
The very first time I tested these Red Velvet Cheesecake Cookies, it was the night before Valentine’s Day and my kitchen looked like a cocoa-dusted science lab. I’d already made a classic red velvet cake earlier that week, and I had half a block of cream cheese staring at me from the fridge, daring me to do something fun. I remember spooning the cream cheese filling onto a tiny baking sheet, thinking, “If this works, it’s going to be dangerous.” When I baked that first tray, the cookies came out with crinkly tops, soft centers, and just the slightest oozing of tangy cheesecake from the middle. I burned my tongue on the very first bite and absolutely no part of me regretted it.
These Red Velvet Cheesecake Cookies quickly turned into a family tradition, especially for holidays when you want dessert to feel a little extra without being fussy. My sister now requests them every Christmas “instead of a cake, please and thank you,” because you get all the drama of red velvet and cheesecake without needing a fork or a fancy plate. I love that they chill in stages: cream cheese centers in the freezer, cookie dough in the fridge—perfect for those busy days when you’re running between errands and oven preheats. If you’ve ever made my stuffed chocolate chip cookies or soft sugar cookies, you’ll recognize the same cozy, bakery-style texture here. These cookies feel like the dressed-up cousin of everyday chocolate cookies: familiar, nostalgic, and just indulgent enough to make any ordinary night feel like a little celebration.
How To Make It (Mix & Ingredients)
To get that classic Red Velvet Cheesecake Cookies magic, you’ll actually mix two components: the creamy cheesecake centers and the rich red velvet cookie dough. Start with the filling so it has time to firm up. Beat brick-style cream cheese, powdered sugar, and a touch of flour until completely smooth—no lumps. Then scoop small 2-teaspoon mounds onto a wax-paper-lined plate or tray. Pop them into the freezer for at least 2 hours; they should feel firm and easy to handle so they don’t ooze out of the cookies later.

Instructions Process of Red Velvet Cheesecake Cookies
While the cheesecake centers chill, whisk your dry ingredients in one bowl: all-purpose flour, cocoa powder, baking soda, and salt. In a separate bowl, cream the softened butter with brown sugar and granulated sugar until it looks fluffy and lighter in color; this step gives your Red Velvet Cheesecake Cookies their soft, chewy texture. Mix in the egg, vanilla bean paste, a splash of vinegar for that trademark tang, and your red food coloring (gel gives the best color). Don’t panic if it looks wildly neon at this stage—once you beat in the dry ingredients, it settles into that deep, velvety red you expect. Cover the bowl and let the dough chill for at least 2 hours (or up to 48); cold dough keeps the cookies thick, helps prevent spreading, and makes stuffing them with cheesecake much easier.
Make-Ahead & Storage
Red Velvet Cheesecake Cookies are a dream for planning ahead because both the dough and the filling actually benefit from a little rest. You can freeze the cream cheese centers on a lined tray, then transfer them to a zip-top bag and keep them frozen for up to 1 month. The red velvet cookie dough can be chilled, tightly covered, in the fridge for up to 48 hours before baking—this helps deepen the flavor and keeps the cookies from spreading too much. If you want to go a step further, assemble the stuffed cookie dough balls, freeze them solid on a tray, then store them in a freezer bag and bake straight from frozen, adding 1–2 minutes to the bake time.
Once baked, let your Red Velvet Cheesecake Cookies cool completely so the cream cheese centers can firm up. Store them in an airtight container in the fridge (they contain dairy) for 4–5 days, layering parchment between cookies to keep them from sticking. For the softest texture, let them sit at room temperature for about 15 minutes before serving, or give them a 5–10 second zap in the microwave if you like that just-baked feel. You can also freeze baked cookies in a single layer, then move them to a container or freezer bag for up to 2 months—just thaw in the fridge overnight. If you’re building a holiday dessert tray alongside treats like red velvet cupcakes or cheesecake bars, these cookies hold their shape and color beautifully, even after a chill.
Best Ingredients & Party Variations
For the softest, most flavorful Red Velvet Cheesecake Cookies, start with brick-style, full-fat cream cheese. The low-fat tubs are great for bagels, but in baking they can make the filling loose and harder to scoop and freeze. Use unsalted butter so you can control the salt, and make sure it’s softened but not shiny or greasy. I love using light brown sugar here; it adds a subtle caramel note that plays beautifully with the tangy cream cheese center. Go for a high-quality cocoa powder (natural, not Dutch-processed) to keep that classic red velvet flavor, and a gel red food coloring so you get vivid color without watering down your dough. If your dough looks very neon red at first, don’t panic—it evens out once you mix in the dry ingredients and bake.
Once you’ve nailed the base recipe, these Red Velvet Cheesecake Cookies turn into a party platter all on their own. For a holiday dessert board, roll the dough balls in granulated sugar, then press in a few festive sprinkles on top before baking. For Valentine’s Day, add a drizzle of simple cream cheese glaze over cooled cookies and sprinkle with crushed freeze-dried strawberries. Hosting a cookie swap? Make a “trio” plate with these, some classic chocolate chip cookies, and a bright batch of lemon crinkle cookies for contrast. You can even do a mini version by using 1 teaspoon of filling and smaller scoops of dough—just shave a couple minutes off the bake time so they stay soft and chewy.
Serving of Red Velvet Cheesecake Cookies
Conclusion
If you’re anything like me, you’ll find yourself making these Red Velvet Cheesecake Cookies “just because” – not only for holidays or special occasions, but for those in-between days that need a little color and comfort. There’s something about that first bite – the tender cookie, the creamy, tangy center – that makes people slow down, smile, and reach for a second. These are the kind of cookies that turn an ordinary afternoon into a little celebration.
I hope you feel confident and excited to bake a batch and share them with the people you love. Set a plate out on the counter, tuck a few into a lunchbox, or show up to a gathering with a tray still slightly warm from the oven. You’ll be amazed how quickly they disappear, and how many sweet moments they spark around the table.
For more delicious recipes like this, follow us on social media!
How do I keep the cheesecake centers from leaking out of my Red Velvet Cheesecake Cookies?
Make sure the cheesecake filling is very cold and firm before you start – freezing the filled scoops for at least 2 hours is key. When you wrap the red velvet dough around the cheesecake, completely seal every seam, especially at the bottom. If you see any white peeking through, pinch on a little extra dough. Chilling the stuffed cookie dough again before baking also helps the cookies hold their shape. Finally, don’t bake them too hot; an even 350°F gives the centers time to set without bursting out.
Recipe

Red Velvet Cheesecake Cookies
Ingredients
Ingredients
- 4 oz cream cheese brick style, full fat, softened
- 3/4 cup powdered sugar
- 1 tbsp all-purpose flour
- 1 2/3 cups all-purpose flour
- 3 tbsp unsweetened cocoa powder
- 1/2 tsp baking soda
- 1/4 tsp salt
- 1/2 cup unsalted butter softened
- 1/2 cup light brown sugar packed
- 1/3 cup granulated sugar
- 1 large egg
- 1 tsp vanilla bean paste or vanilla bean paste
- 1 tsp distilled white vinegar
- 1 1/2 tsp red gel food coloring
- 1/3 cup granulated sugar for rolling (optional)
- 1 tbsp milk
- 1 1/4 cups powdered sugar for glaze
Instructions
- In a medium bowl, beat the cream cheese, 3/4 cup powdered sugar, and 1 tbsp flour until smooth and creamy.
- Line a small baking sheet or large plate with wax paper. Scoop the cream cheese mixture into 2-teaspoon mounds onto the lined surface.
- Freeze the cream cheese mounds for at least 2 hours, or until firm.
- In a medium bowl, whisk together 1 2/3 cups flour, cocoa powder, baking soda, and salt; set aside.
- In a large bowl, beat the softened butter, brown sugar, and 1/3 cup granulated sugar until creamy and slightly fluffy.
- Add the egg, vanilla bean paste, vinegar, and red gel food coloring to the butter mixture and beat until well combined.
- Add the dry ingredients to the wet ingredients and beat on low speed just until a soft dough forms and no dry streaks remain.
- Cover the dough tightly with plastic wrap and refrigerate for at least 2 hours or up to 48 hours.
- Line a baking sheet with parchment paper. Scoop about 1 to 1 1/2 tbsp of chilled dough, flatten it slightly in your hand, and gently curve the edges up to form a shallow cup.
- Take 1 frozen cream cheese mound from the freezer and place it in the center of the dough cup, keeping the remaining mounds frozen as you work.
- Scoop another 1 to 1 1/2 tbsp of dough, flatten it slightly, and place it over the cream cheese mound.
- Pinch the edges of the dough together to fully seal in the filling, then roll gently between your palms to form a smooth ball.
- If rolling in sugar, place 1/3 cup granulated sugar on a small plate and roll each dough ball in the sugar to coat.
- Place the dough balls on the parchment-lined baking sheet, cover, and freeze for at least 30 minutes or until firm.
- When ready to bake, preheat the oven to 350°F and line additional baking sheets with parchment paper.
- Arrange the frozen cookie dough balls on the prepared baking sheets, spacing them at least 2 inches apart. Do not thaw before baking.
- Bake one sheet at a time in the center of the oven for 12 to 14 minutes, or until the tops look set and the edges are slightly firm.
- Allow the cookies to cool completely on the baking sheet so the cream cheese centers can set.
- For the glaze, whisk together 1 tbsp milk and 1 cup of powdered sugar in a small bowl until smooth, then add up to 1/4 cup more powdered sugar as needed until the glaze is white and thin enough to drizzle.
- Drizzle the glaze over the cooled cookies, using a spoon or piping it from a small freezer bag with the corner snipped off. Let the glaze set before serving.
Notes
- Chilling the dough and freezing the stuffed balls helps the cookies stay thick and prevents the filling from leaking out.
- You can assemble the stuffed dough balls and freeze them in a freezer bag for up to 1 month; bake straight from frozen, adding 1 to 2 minutes to the bake time.
- Store baked cookies in an airtight container in the refrigerator for 4 to 5 days and let them sit at room temperature before serving for the best texture.