The Memory Behind This Treat
The first time I made Mint Chocolate Kiss Blossom Cookies, it was one of those December nights when the kitchen windows fog up and everything smells like sugar and butter. My sister and I were elbows-deep in dough, trying to fill yet another round of Christmas cookie tins for neighbors, teachers, and the mail carrier who always left dog treats in our box. Our regular peanut butter blossoms were cooling on one rack, and the tray looked a little too beige and predictable. I remember looking at a bag of chocolate kisses, a tiny bottle of peppermint extract, and some forgotten green food coloring and thinking, “Well, we could at least make things look more festive.” Ten minutes later, we had a bowl of the prettiest pale green dough, and the whole kitchen smelled like a candy cane factory.
Of course, that first batch of Mint Chocolate Kiss Blossom Cookies wasn’t perfect. I went overboard with the peppermint and underbaked the first tray, so they were so soft they almost collapsed when we pressed the kisses in. We learned quickly: use a light hand with mint, pull the cookies when the tops look just set, and unwrap the chocolate kisses before the timer goes off so you’re not frantically peeling wrappers with buttery fingers. But even with their tiny flaws, those cookies disappeared faster than the classics on every plate we delivered. Now, whenever I cream butter and powdered sugar together and watch that green streak swirl through the bowl, I’m right back in that warm, chaotic kitchen—hands messy, timer ticking, and a counter full of cookies that never stay around for long.
How To Make It (Mix & Ingredients)
To make these Mint Chocolate Kiss Blossom Cookies, you’ll start by building a soft, buttery mint dough. Beat room-temperature butter with powdered sugar until it looks pale and fluffy—this should take 2–3 minutes with a hand mixer. Add the whole egg, extra egg yolk (this is our secret for that melt-in-your-mouth texture), peppermint extract, and a few drops of green food coloring. Mix until everything looks smooth and creamy, then adjust the green shade to your liking drop by drop. In a separate bowl, whisk together the flour, baking powder, and salt, then gently mix the dry ingredients into the wet just until you no longer see flour. The dough will feel soft but not sticky; if it seems crumbly, keep mixing for another 10–15 seconds so it fully comes together.
Instructions Process of Mint Chocolate Kiss Blossom Cookies
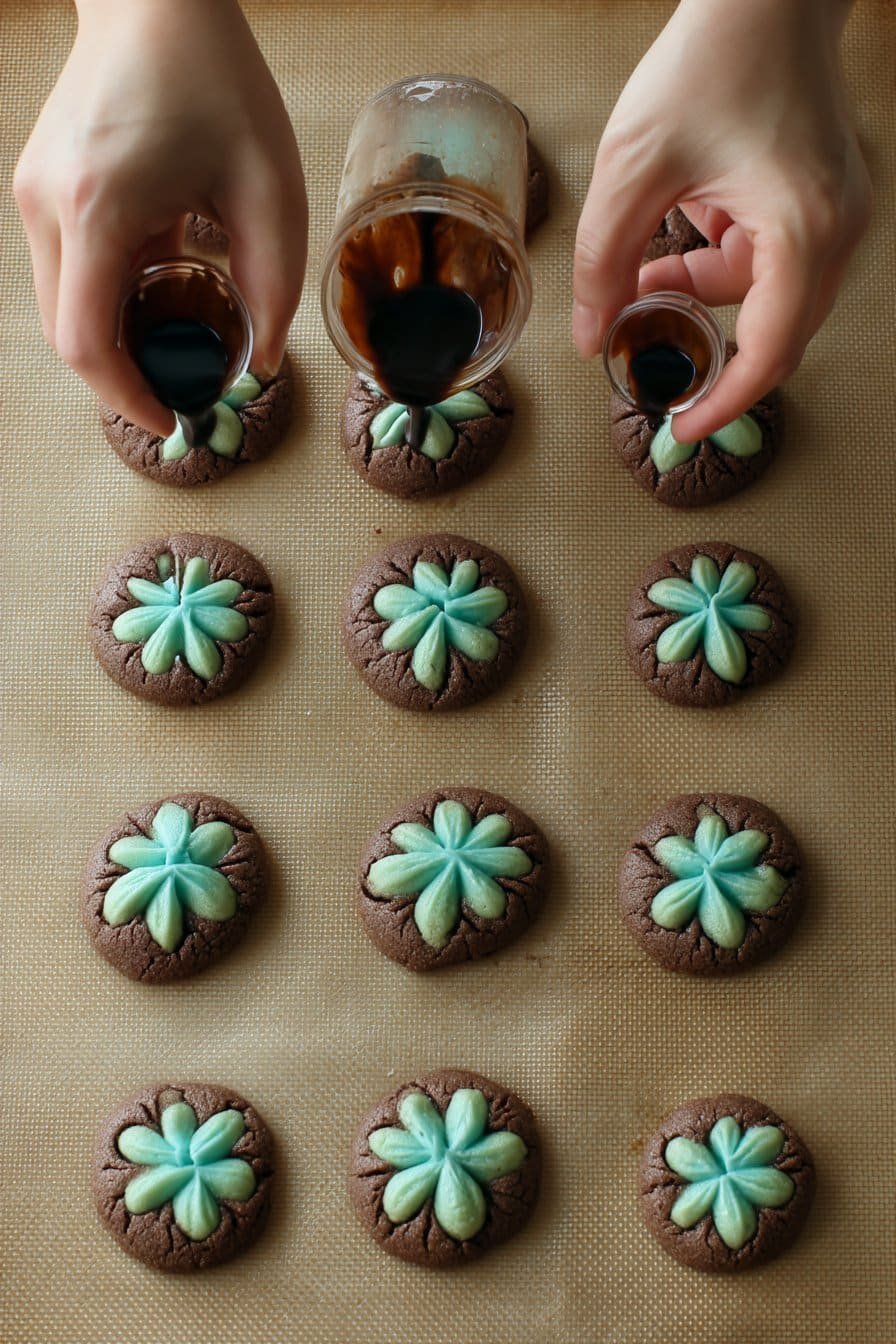
Once the dough is ready, scoop and roll it into 1-inch balls—about the size of a rounded tablespoon—and line them up on a parchment-lined baking sheet. You don’t need to chill this dough, which makes these Mint Chocolate Kiss Blossom Cookies perfect for last-minute baking. Bake them at 350°F for 7–9 minutes; they should look puffed and set around the edges but still pale on top. Let the cookies sit on the hot sheet for 2 minutes (this helps them stay tender), then gently press a chocolate kiss into the center of each cookie. Move them to a wire rack to cool completely so the chocolate sets instead of melting into a puddle. If you’re building a holiday cookie tray, these look beautiful next to something classic and simple like sugar cookies or shortbread.
Make-Ahead & Storage
Mint Chocolate Kiss Blossom Cookies are wonderfully make-ahead friendly, which is exactly what you need during the holiday rush. For baked cookies, let them cool completely so the chocolate kisses re-firm, then store them in an airtight container at room temperature for 4–5 days. To keep the chocolate kisses from smudging, you can layer the cookies between sheets of parchment or wax paper. These cookies also freeze well: place them in a single layer on a baking sheet to freeze, then transfer to a freezer bag or container for up to 2 months. Thaw at room temperature for about 30 minutes before serving so the minty flavor and tender texture come back to life.
If you like to stay one step ahead, you can prep the cookie dough for your Mint Chocolate Kiss Blossom Cookies in advance. Make the dough as directed, then cover tightly and refrigerate for up to 2 days; let it sit on the counter for 15–20 minutes if it’s too firm to roll. For longer storage, portion the dough into 1-inch balls, flash-freeze on a baking sheet until solid, then store in a freezer-safe bag for up to 2 months. You can bake the dough balls from frozen—just add 1–2 minutes to the bake time and keep an eye on the edges so they stay soft and not dry. Press the chocolate kisses into the warm cookies right after baking, just as you would with fresh dough, and you’ll still get that classic, melty center and festive look.
Best Ingredients & Party Variations
For the very best Mint Chocolate Kiss Blossom Cookies, start with real butter, not margarine. You want that rich, creamy flavor to balance the peppermint. Use powdered sugar as written—granulated sugar will make the cookies spread more and lose that cute, puffy shape. I like using a good-quality peppermint extract and going light at first; you can always add more, but you can’t take it away if they start tasting like toothpaste. For the green color, gel food coloring gives you a deeper, more even minty shade without watering down the dough. And of course, use fresh chocolate kisses—old ones can have that dull, gray “bloom” and won’t look nearly as pretty on your cookie trays.
Once you’ve nailed the classic version, these Mint Chocolate Kiss Blossom Cookies are a playground for party variations. For a snowy look, roll the dough balls in granulated sugar or sparkling sanding sugar before baking. For Christmas cookie plates, try half the batch topped with chocolate kisses and the other half with candy cane or mint-swirl kisses for a mixed platter that looks instantly special. You can also make a “celebration” version by rolling the dough in red, white, and green nonpareils for extra crunch and color. If you’re doing a dessert bar with things like hot chocolate cookies or crinkle brownies, make these cookies half-size (about 1/2 tablespoon dough) for adorable bite-size blossoms that guests can grab and go.
For a flavor twist, swap half the peppermint extract for vanilla to mellow the mint for kids or more sensitive palates. Hosting a winter movie night? Make a hot cocoa spread: serve your Mint Chocolate Kiss Blossom Cookies with big mugs of cocoa, mini marshmallows, and maybe a plate of chocolate peppermint brownies for the true mint lovers. And if you want a more “grown-up” take, use dark chocolate kisses and finish the cooled cookies with the lightest dusting of powdered sugar—they’ll look like they came straight from a bakery box.

Serving of Mint Chocolate Kiss Blossom Cookies
Conclusion
If you’re anything like me, the best memories don’t happen at the table – they happen in the kitchen, with the oven humming and someone sneaking a warm cookie off the tray. These Mint Chocolate Kiss Blossom Cookies are the kind of bake that turns an ordinary afternoon into a tiny celebration: kids unwrapping candies, friends “just stopping by” for a taste, you stealing a quiet moment with a cookie and a cup of something cozy.
I hope this recipe finds a place in your own traditions, whether that’s holiday cookie platters, movie nights, or just a Tuesday that needed a little extra sweetness. Baking doesn’t have to be fancy to feel special – sometimes all it takes is a soft, minty cookie and a glossy chocolate kiss to bring people together.
Go ahead and give these a try, tweak them to your taste, and make them your own. And if you do bake them, I’d absolutely love to hear how they turned out and who you shared them with.
For more delicious recipes like this, follow us on social media!
What makes these Mint Chocolate Kiss Blossom Cookies turn out soft and melt-in-your-mouth?
The secret to soft Mint Chocolate Kiss Blossom Cookies is creaming the butter and powdered sugar until very light and fluffy before you add anything else. This whips air into the dough and gives you that tender, almost shortbread-like texture. Measure your flour carefully and avoid packing it into the cup, or the cookies can turn out dry. Bake just until the edges are set, usually 7–9 minutes, and pull them even if they look a touch underdone. They’ll finish setting on the hot baking sheet as they cool, staying soft instead of turning crisp.
Can I adjust the mint flavor and green color in Mint Chocolate Kiss Blossom Cookies?
Yes, both the mint intensity and color are totally customizable in these Mint Chocolate Kiss Blossom Cookies. If you like a lighter mint flavor, start with 1/2 teaspoon peppermint (or mint) extract, taste a tiny bit of dough, and add more in small increments. Use less if you’re baking for kids or mint-shy friends, and more if you want that classic, cool mint punch. For the color, begin with 6 drops of green food coloring and mix well before adding more. You can go for a soft pastel green for everyday baking or a deeper holiday green for Christmas cookie plates.
How do I keep the chocolate kisses from melting or sliding off the cookies?
Always add the chocolate kisses after baking, not before, to keep their iconic shape. Once the cookies come out of the oven, let them sit on the hot pan for about 2 minutes so they firm up slightly but are still warm. Gently press a chocolate kiss into the center of each cookie until it nestles in but doesn’t crack the surface too much. If your kitchen is very warm, you can pop the pan into the fridge for 10–15 minutes to help the chocolate set. This keeps the kiss neat, glossy, and perfectly perched on top.
Recipe

Mint Chocolate Kiss Blossom Cookies
Ingredients
Ingredients
- 10 tablespoons unsalted butter room temperature
- 1 cup powdered sugar
- 1 large egg
- 1 large egg yolk
- 1 teaspoon peppermint extract
- 6 to 12 drops green food coloring
- 2 cups all-purpose flour
- 3/4 teaspoon baking powder
- 1/4 teaspoon kosher salt
- 24 chocolate kisses unwrapped
Instructions
- Preheat oven to 350°F and line a baking sheet with parchment paper or a silicone baking mat, or lightly spray with nonstick baking spray.
- In a large mixing bowl, cream the butter and powdered sugar together with a hand mixer or stand mixer on medium speed until light and fluffy, about 2 to 3 minutes.
- Add the egg, egg yolk, peppermint extract, and 6 drops of green food coloring to the bowl and mix until smooth, then add additional drops of food coloring as needed until the desired shade of green is reached.
- In a separate bowl, whisk together the flour, baking powder, and kosher salt, then add the dry ingredients to the wet ingredients and mix on low speed just until combined and a soft dough forms.
- Roll the dough into 1-inch balls, using about 1 rounded tablespoon of dough for each cookie, and place them on the prepared baking sheet, spacing them about 2 inches apart.
- Bake the cookies for 7 to 9 minutes, until they look puffed and just set but are still pale on top; do not overbake.
- Remove the baking sheet from the oven and let the cookies sit on the sheet for about 2 minutes, then gently press one chocolate kiss into the center of each warm cookie.
- Transfer the cookies to a wire rack and let them cool completely until the chocolate kisses are set before serving or storing.
Notes
- Unwrap the chocolate kisses before the cookies finish baking so they are ready to press in while the cookies are still warm.
- Store cooled cookies in an airtight container at room temperature for up to 5 days, layering with parchment paper if needed.
- For longer storage, freeze baked cookies in a single layer until firm, then transfer to an airtight container and freeze for up to 2 months.