The Memory Behind This Treat
The first time I made these Coconut Dream Bars, it was just a few days before a family reunion at my grandmother’s old farmhouse. The house was filled with laughter, stories, and the faint aroma of her legendary coconut cream pie, a recipe she guarded like a treasure. Feeling inspired, I decided to experiment with a new twist on her classic, aiming for something easy to share with a crowd but packed with those familiar, comforting flavors.
As I whipped up the buttery base and watched the golden coconut topping emerge from the oven, I couldn’t help but be transported back to those sunny afternoons on my grandmother’s porch. The sweetened condensed milk and shredded coconut filled the kitchen with a scent that was both nostalgic and enticing. It reminded me of the joy that comes with family gatherings—the kind where dessert is more than just a treat; it’s a memory shared.
When the bars made their debut at the reunion, they quickly became the talk of the day. Even my grandmother, with her discerning taste, gave a nod of approval. These bars have since become a staple at our family gatherings, bridging generations with each chewy, coconut-laden bite. Now, every time I make them, I’m reminded of that first rainy afternoon and how a simple dessert can connect us to our roots, much like a cherished story passed down through the years.
How To Make It (Mix & Ingredients)
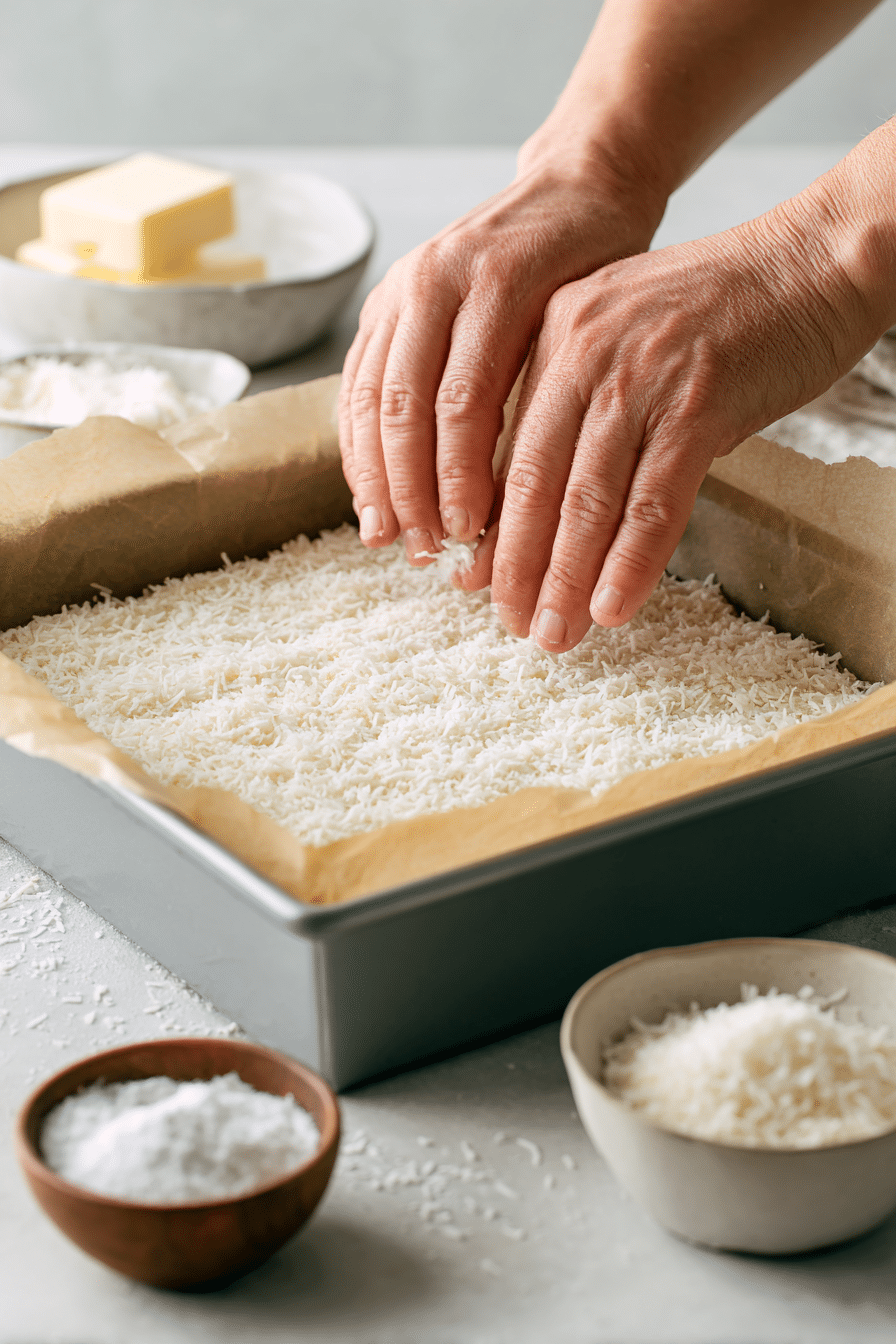
Creating these Coconut Dream Bars is like taking a mini-vacation to a tropical paradise right in your kitchen. Start by preparing your pan with parchment paper—this ensures easy removal later. For the cookie crust, cream together softened butter and sugar until it looks like fluffy clouds, then gently mix in flour and salt. Press this buttery dough into your pan, forming a delicious foundation. Bake until you see the edges turning a lovely golden hue.
Instructions Process of Coconut Dream Bars
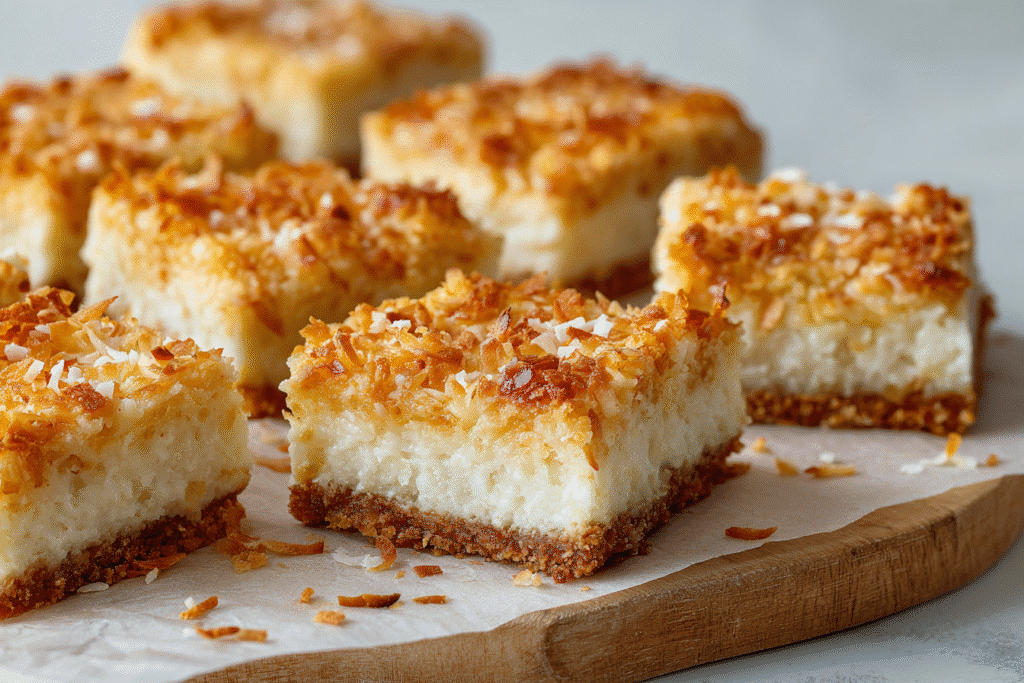
While your crust cools, it’s time to dive into the gooey layer. In a saucepan, combine sweetened condensed milk, brown sugar, and butter over medium heat. Stir this mixture lovingly—it will thicken and coat the back of your spoon, a sign it’s ready for a flavor boost of vanilla. Pour this caramel-like goodness over the crust, creating a luscious middle layer.Next, whip up the coconut cream layer. Beat softened cream cheese with powdered sugar until silky smooth. Fold in whipped topping and, if you’re feeling adventurous, a splash of coconut extract for that extra island vibe. Spread this creamy concoction over the cooled gooey layer, then sprinkle the lightly toasted shredded coconut on top. This final touch gives your bars a delightful texture and a golden finish. Trust me, these steps create a dessert that’s as indulgent as it is easy—perfect for any gathering or simply spoiling yourself!
Make-Ahead & Storage
One of the many joys of these Coconut Dream Bars is their perfect suitability for making ahead. If you’re preparing for a big event or simply enjoy planning your desserts in advance, these bars are a dream come true. You can prepare the entire recipe up to 2 days before you plan to serve them. Once the bars have completely cooled, cover them tightly with aluminum foil or plastic wrap and store them in the refrigerator. This not only keeps them fresh but also enhances the flavors, allowing the coconut and cream to meld beautifully.
When it comes to storing leftovers—if there are any!—you can keep the bars in an airtight container in the fridge for up to 5 days. This makes them a fantastic option for a week’s worth of sweet snacks or an unexpected treat for guests. If you’d like to extend their life, consider freezing the bars. Wrap individual pieces in plastic wrap and then place them in a freezer-safe bag. They’ll keep well in the freezer for up to 2 months. When you’re ready to enjoy, simply thaw them in the refrigerator overnight.
If you’re looking for more delicious treats that are freezer-friendly, you might also enjoy my classic Lemon Bars or rich Chocolate Fudge Brownies. Both offer that same make-ahead convenience with a different flavor twist, perfect for any dessert lover’s repertoire. Remember, planning ahead doesn’t just make your life easier—it makes your desserts even more delightful!
Best Ingredients & Party Variations
When crafting these Coconut Dream Bars, using the best ingredients makes a world of difference. For the cookie crust, opt for high-quality unsalted butter. It not only gives that melt-in-your-mouth texture but also a rich flavor base. Freshly bought all-purpose flour and granulated sugar ensure your crust bakes up perfectly. Don’t skimp on the vanilla extract in the gooey layer—real vanilla provides a depth that complements the sweetened condensed milk beautifully.
For the coconut cream layer, if you’re feeling adventurous, make your own whipped cream. It elevates the creaminess and adds a homemade touch. And about that sweetened shredded coconut? Toasting it brings out its natural oils, creating a fragrant, golden topping that’s simply irresistible. These choices might seem small, but they’re the secret to turning a good bar into an unforgettable one.
Thinking of switching things up for a party? Consider adding a sprinkle of chopped macadamia nuts or even a few dark chocolate chips into the gooey layer for a tropical spin. You could also drizzle melted chocolate over the bars before serving for a touch of elegance. These variations not only enhance the visual appeal but also introduce new flavors that will have your guests raving. Whether it’s a casual get-together or a festive occasion, these bars adapt beautifully, making them the star of any dessert spread.
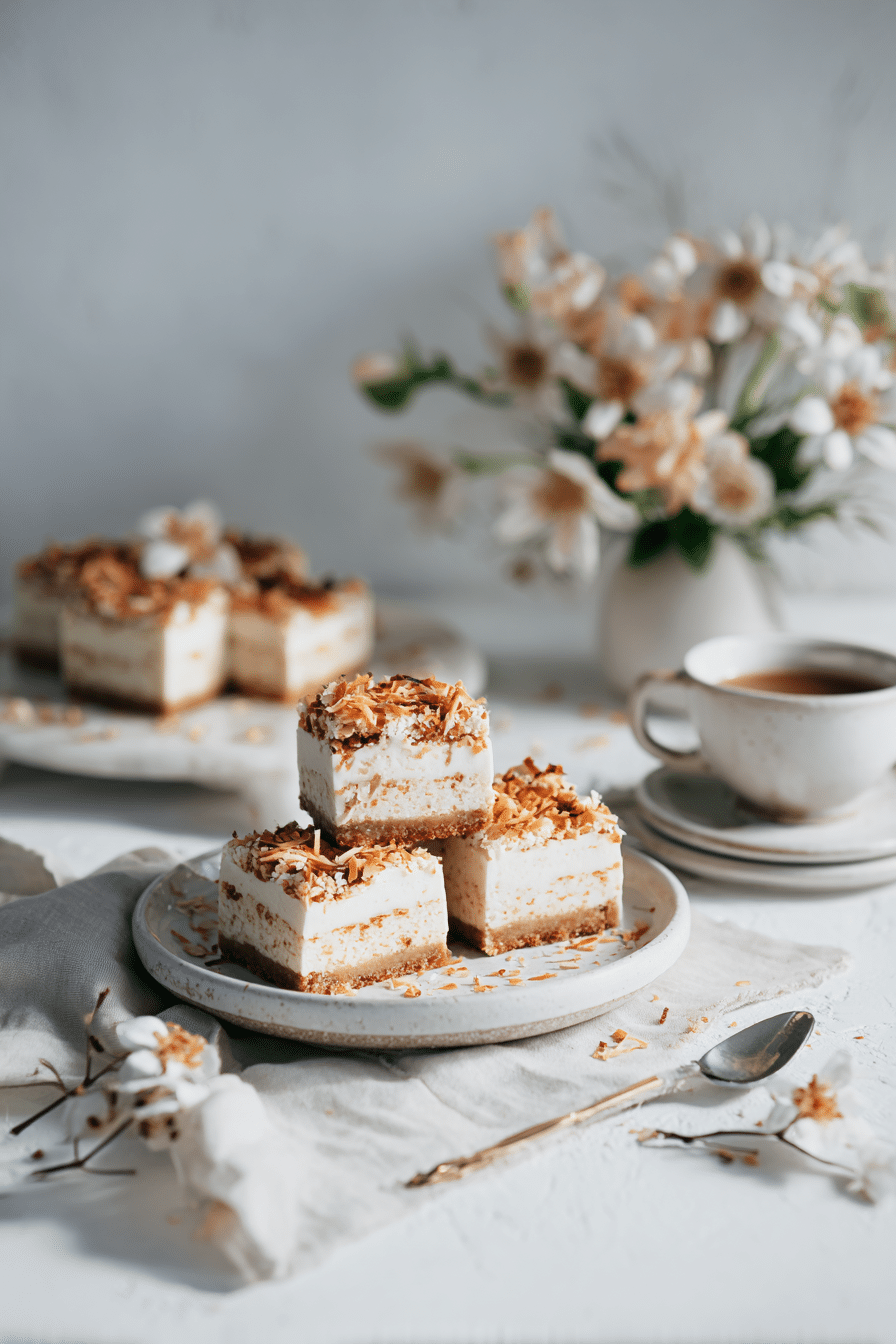
Serving of Coconut Dream Bars
Conclusion
Making these Coconut Dream Bars is like taking a mini-vacation to a sun-kissed island, right from your kitchen. The act of baking this sweet treat not only fills your home with the warm, inviting aroma of toasted coconut but also creates a special moment to share with loved ones. Whether you’re enjoying a slice with family on a lazy Sunday afternoon or bringing a batch to a friend’s gathering, these bars have a magical way of bringing people together.
I hope you’re as enchanted by these bars as I am. They’re a perfect reminder of how simple ingredients can transform into something extraordinary. So, why not give this recipe a try? Feel the joy of creating a little piece of paradise with your own hands.
For more delicious recipes like this, follow us on social media! Let’s keep the sweet moments coming, together.
What makes Coconut Dream Bars unique?
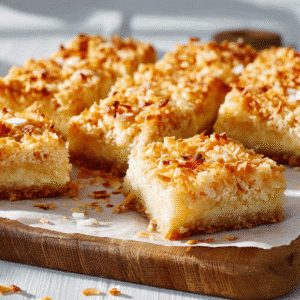
Coconut Dream Bars are a delightful layered dessert featuring a buttery cookie crust, a gooey caramel-like filling, and a creamy coconut layer, topped with toasted coconut. They’re perfect for anyone who adores rich, tropical flavors. Each bite offers a sweet escape to paradise, reminiscent of sunny vacations and indulgent treats by the beach.
Can I substitute the sweetened condensed milk in Coconut Dream Bars?
Sweetened condensed milk is a key ingredient for achieving the gooey texture and sweetness essential to Coconut Dream Bars. If you’re seeking alternatives, you might try making your own condensed milk using evaporated milk and sugar, but be prepared for slight variations in consistency. It’s truly worth using the real deal for that classic dreamy texture.
Recipe
Coconut Dream Bars
Ingredients
Ingredients
- 1 cup unsalted butter softened
- 1/2 cup granulated sugar
- 2 cups all-purpose flour
- 1/4 tsp salt
- 1 14 oz can sweetened condensed milk
- 1/2 cup brown sugar
- 1/4 cup unsalted butter
- 1 tsp vanilla bean paste
- Pinch of salt
- 1 8 oz package cream cheese, softened
- 1/2 cup powdered sugar
- 1 1/2 cups whipped topping
- 1 tsp coconut extract optional
- 1 1/4 cups sweetened shredded coconut lightly toasted
Instructions
- Preheat the oven to 350°F and line a 9x13-inch baking pan with parchment paper, allowing an overhang.
- Cream together softened butter and granulated sugar until light and fluffy. Add flour and salt, mixing until a dough forms. Press dough into prepared pan. Bake for 18–20 minutes, until edges are lightly golden. Let cool.
- In a saucepan over medium heat, combine sweetened condensed milk, brown sugar, and butter. Stir until thickened, about 8–10 minutes. Remove from heat, stir in vanilla and salt, pour over baked crust. Bake for 10 minutes more. Let cool completely.
- Beat cream cheese until smooth, add powdered sugar and coconut extract, beating until creamy. Fold in whipped topping until combined. Spread over cooled filling.
- Toast shredded coconut in a dry skillet over medium-low heat until golden, about 3–5 minutes. Sprinkle over bars.
- Refrigerate for at least 4 hours or overnight until set. Lift out using parchment, slice into 16 squares.
Notes
- Use parchment with overhang for easy removal.